Sales Admin (Only for Sales Administrators, Sales Coordinators, and Sales Managers)
Each tab is described in its own section below.
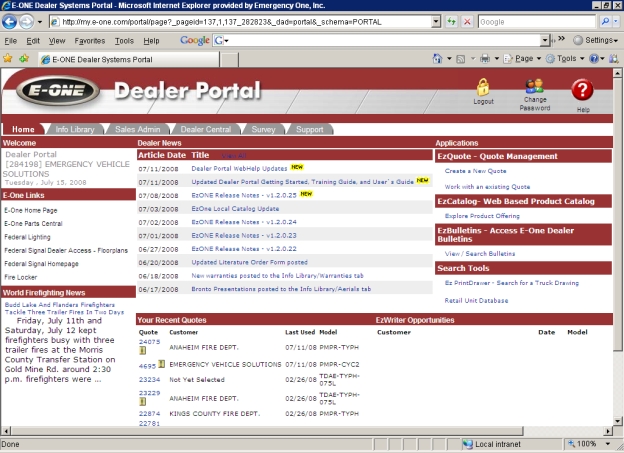
After you log in to the Dealer Portal you will be on the Home tab. The Home tab displays the Home Page of the Dealer Portal. From here you can view the recent Dealer News, Applications, Your Recent Quotes, and E-ONE links sections.
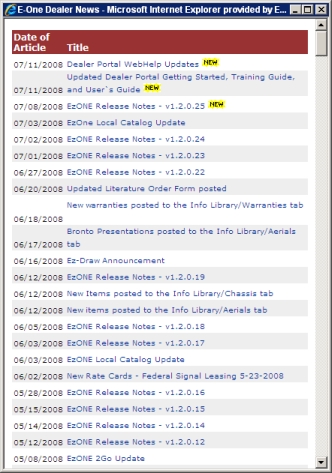
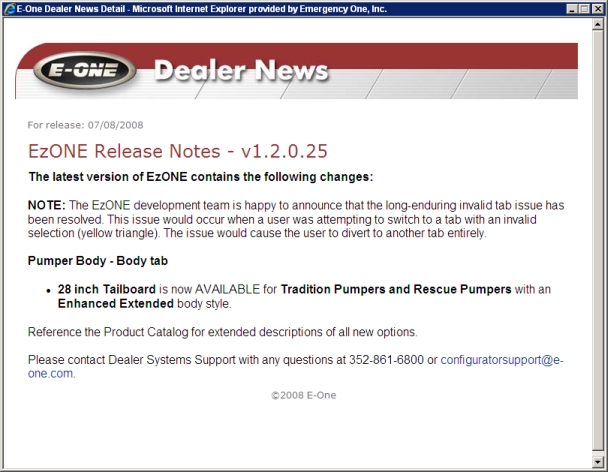
Dealer News section: This area lists all of the recent news items that are posted every week to keep the dealers informed and updated about recent changes to the sales tool. Clicking on one of the links displays a new window with a description. Clicking on the View All link displays the E-ONE Dealer News window with all past new items posted. Clicking on a news article link displays the news item in a new window.
Applications section:
EzQuote - Quote Management section: This area allows a dealer to click on the one of the following links: Create a New Quote or Work with an existing Quote.
EzCatalog - Web Based Product Catalog section: This section allows a dealer to Explore Product Offering using the Product Catalog
EzBulletins - Access E-One Dealer Bulletins: This section allows dealers to View / Search Bulletins. These are also posted via e-mail.
Search Tools section: Access Ez-ONE Active Bid drawings from Search for a Truck Drawing and the Retail Unit Database.
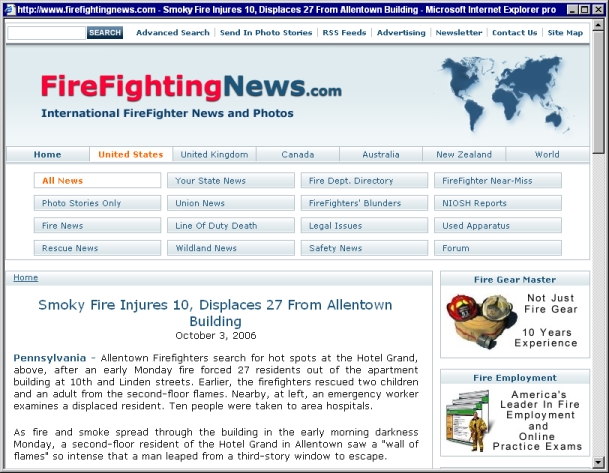
World Fire Fighting News section: This area has news stories of fire fighting events from around the world through news feeds. Clicking on a blue link displays the article in a new window.
Your Recent Quotes section: This area displays up to the 10 most recent quotes that have been worked by the dealer. Each quote has a number assigned to it and may have a customer picked and/or a truck configured. Clicking on the number link displays the quote window . Clicking on the View All link displays the Your Recent Quotes window with all quotes listed for the sales rep.
EzWriter Opportunities section: This area lists all the sales leads for the dealer when a department successfully completes a configuration and submits it for a quote.
View / Search Bulletins link:
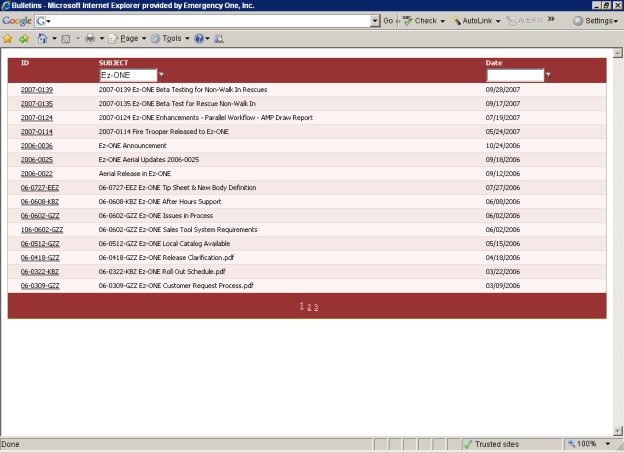
Click the link to view the bulletins. The Bulletin window appears with an ID column, a Subject field and a Date field for searching.

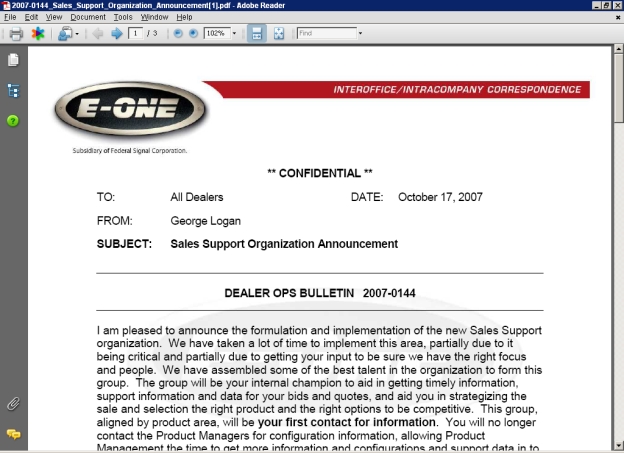
Viewing a Bulletin
Click on an ID link a view a bulletin. The File Download dialog box appears.
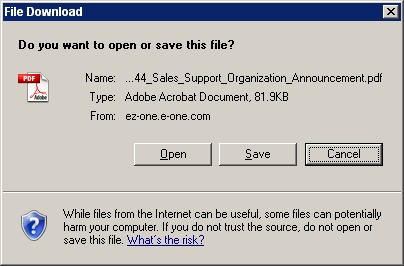
Click the Open button and the bulletin appears in Adobe Reader.
Search for a bulletin and filter the results
Each field has an input box at the bottom of each field header.
Enter text or an amount into the input box of the corresponding field in which you want to filter.
Click on the icon to the right of the input box to select the type of filter you would like to apply. Once selected the filter will be applied to the data being viewed.
It is possible to apply multiple filters by following the instructions on step 3 for any other fields in which you would like to apply a filter.
To remove a filter click on the icon to the right of the input box being used as a filter and select No Filter.
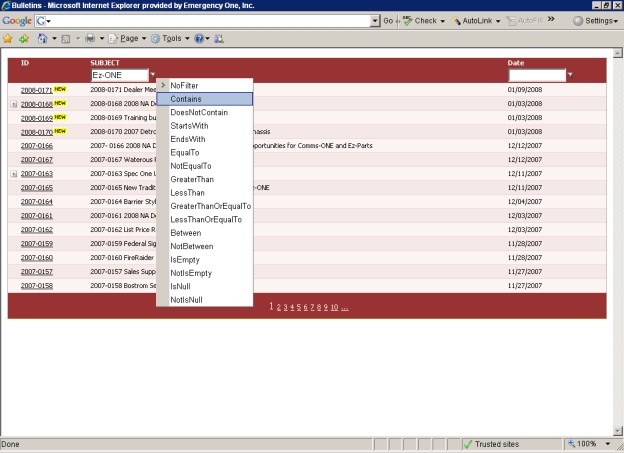
Once the filter is applied, the results will be displayed.
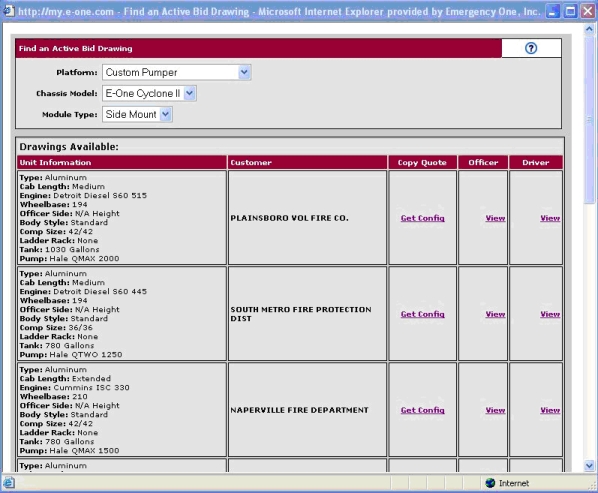
From the application section of the main Portal page: Select the Search for a Truck Drawing and a pop-up window will allow for selection of the type of truck see below:
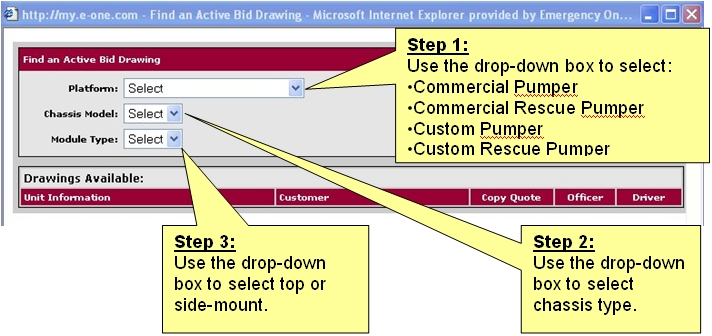
After these three steps, all trucks matching the defined criteria will be displayed (a screen capture is displayed on the next page). From here, you can view officer or driver side drawings which can be printed or saved on your computer very good tool to start a bid process or as a discussion point with a department.
The Get Config selection is where this feature really shines! The Get Config selection will bring that quote into your specific log-on and saved area and allow you to personalize the drawing and quote to your specific department. In other words, you will be able to take an existing drawing and quote, customize it for your department and be able to share drawings, specs and pricing in a matter of minutes!
We realize that each department may want to make revisions to better fit their specific needs and requirements but the Ez-ONE Team has giving us the ability to prospect and initiate early conversations, based off of existing truck specs and drawings, and in lightning-fast speed.
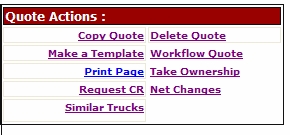
There is also a link to Ez-ONE Print Drawer in the quote header tab of the Ez-ONE. The link is labeled Similar Trucks. This link will pre-populate the search criteria based on the quote you are working on.
This data will be updated daily with every EzONE-generated drawing returned from the bid review workflow Mainline Product quotes (Custom / Commercial Pumpers and Rescue Pumpers) must be workflowed through Bid Review for configuration and pricing validation. Can only be done after a quote is created and an apparatus is configured with a valid Mainline Product configuration.. The only exception is dealer or customer-specific requests those files will not the available until the order is released.
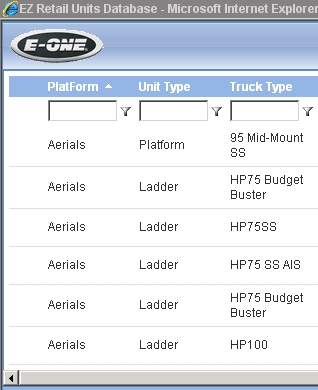
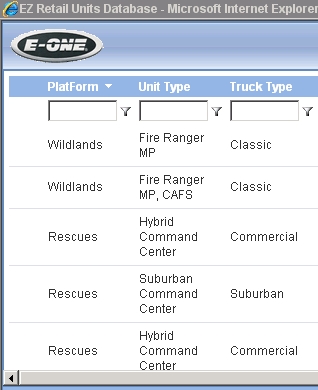
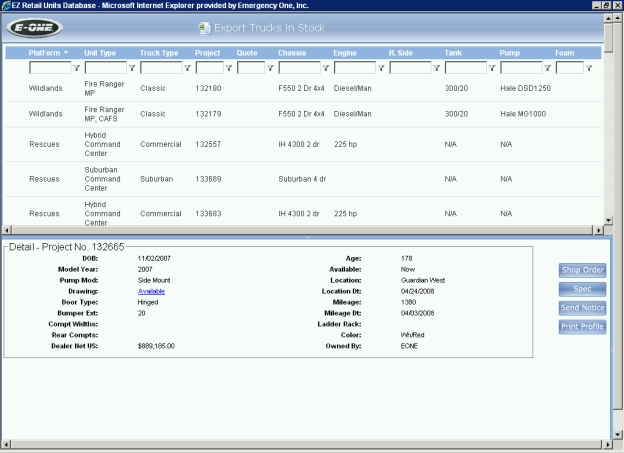
You can search the retail availability list by selecting key features.
Click on the Retail Unit Database link Clicking on this link from the Dealer Portal A Web based server application that runs in Microsoft® Internet Explorer® utilizing Web services on the Internet. This application improves and simplifies your sales process. page from the Home tab Displays the Home page and the Press Releases, Dealer News from E-ONE, Your Recent Quotes, and the E-ONE links. will allow you to find a Tradition, American Eagle A Product Line selection on the EzONE Hub menu will allow the conversion of a quote from Mainline to American Eagle and back again, at any time. or Mainline retail unit and print the quote details, drawings and specifications without having to rely on internal E-One personnel.Dealer Portal page from the Home tab will allow you to find a Tradition, American Eagle or Mainline retail unit and print the quote details, drawings and specifications without having to rely on internal E-One personnel.Dealer Portal page from the Home tab will allow you to find a Tradition, American Eagle or Mainline retail unit and print the quote details, drawings and specifications without having to rely on internal E-One personnel.Dealer Portal page from the Home tab will allow you to find a Tradition, American Eagle or Mainline retail unit and print the quote details, drawings and specifications without having to rely on internal E-One personnel.Dealer Portal page from the Home tab will allow you to find a Tradition, American Eagle or Mainline retail unit and print the quote details, drawings and specifications without having to rely on internal E-One personnel. found on your Dealer Portal home page.
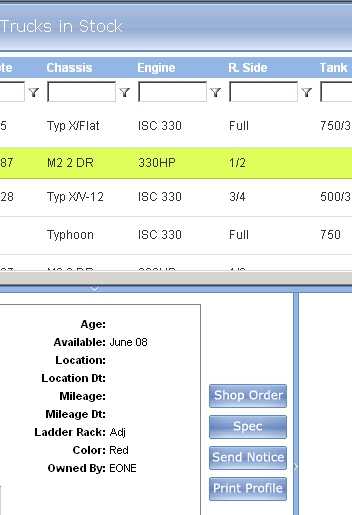
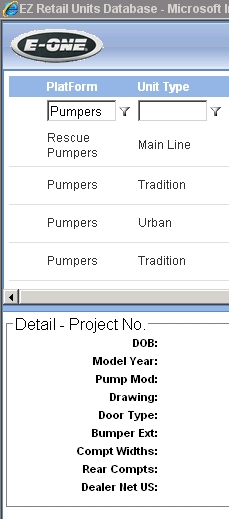
To View Detail Information:
Click on any row in the table.
Once selected the row will be highlighted in light green.
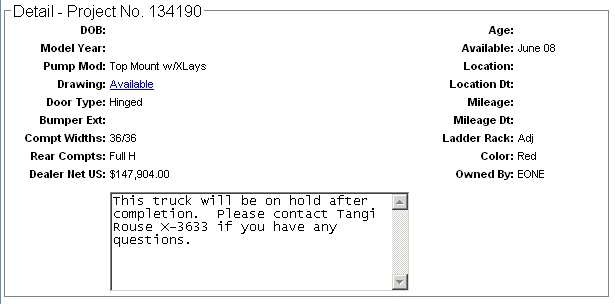
In the detail section, the project (SO) number will appear as well as other basic information. In addition, any files associated with this project will appear in lower right hand window next to the detail window.
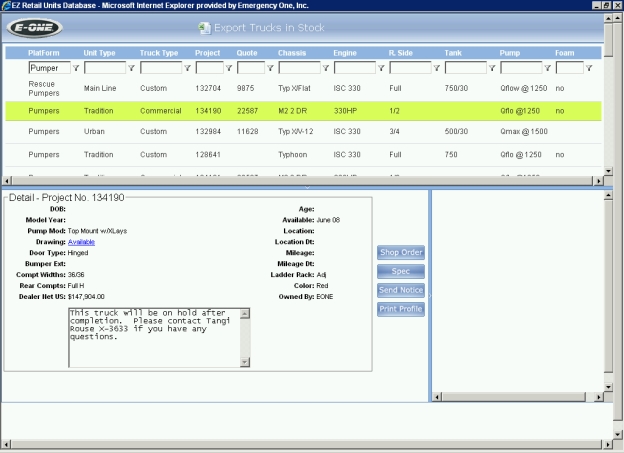
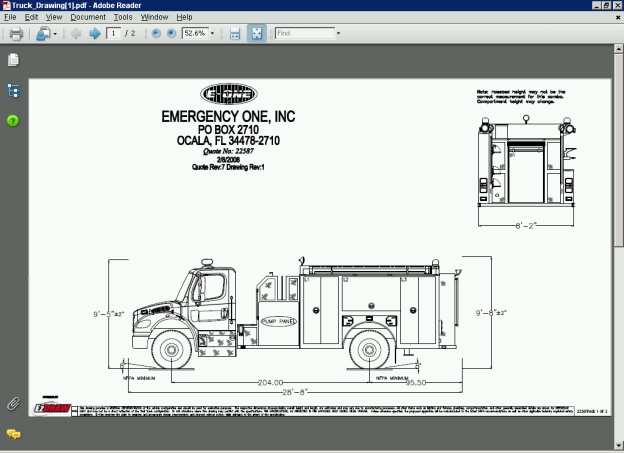
To View a Drawing:
If there is a drawing available for the selected project, a hyperlink showing Available will appear next to the Drawing: label in the detail section.
Click on the link to open a .PDF file containing the specified drawing.
The File Download - Security Warning dialog box appears. Click Open to view the drawing.
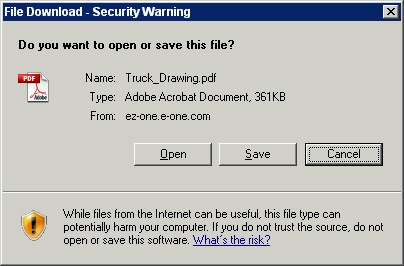
The drawing is rendered in Adobe Reader.
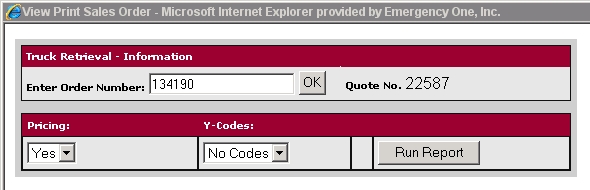
To view a shop order:
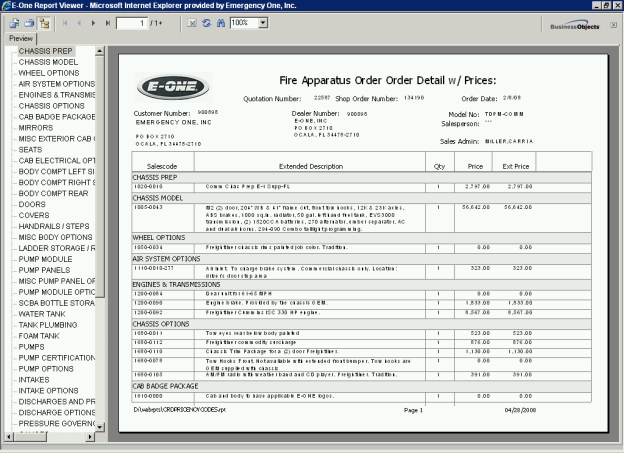
Select a project, click on the Shop Order button in the detail section. This will open up the View Print Sales Order page.
Click the Run Report button Generate a quote from the Reports tab The Reports tab on the quote window, allows you to generate twelve quick quotes, four quick specifications, seven reports, four forms, a Turning Radius report, an AMP Draw report, and a cover page. of the EzQuote window.Reports tab of the EzQuote window.Reports tab of the EzQuote window.Reports tab of the EzQuote window.Reports tab of the EzQuote window. to view the sales order detail.
To view a project spec:
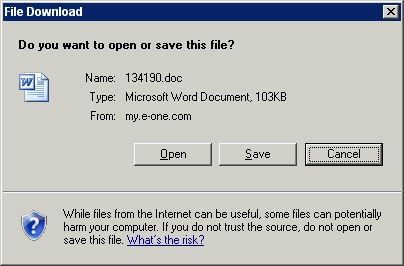
Select a project, click on the Spec button in the detail section. This will open up a word document listing the spec of the project selected.
The File Download dialog box appears. Click Open to view the spec.
The spec appears in Word.
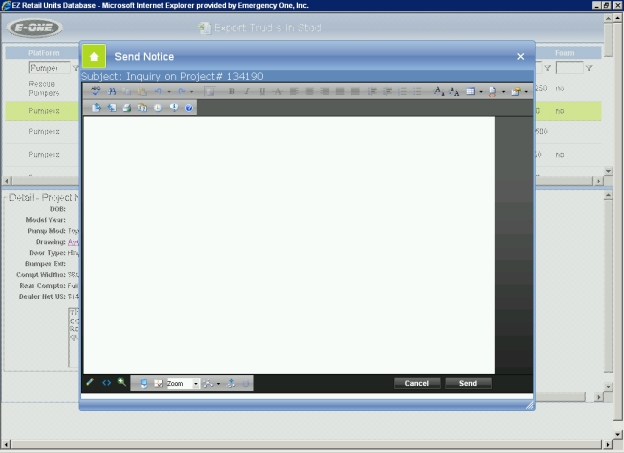
To send a notice or inquire about a project to the EZ Retail Units Database Administrator:
Select a project, click on the Send Notice button in the details section. This will open up a window that will have a WYSIWYG type editor with a subject heading that will identify the truck you are inquiring about.
Add notes to the text section of the window and click on the Send button to send the message to the administrator or click on Cancel to cancel the message.
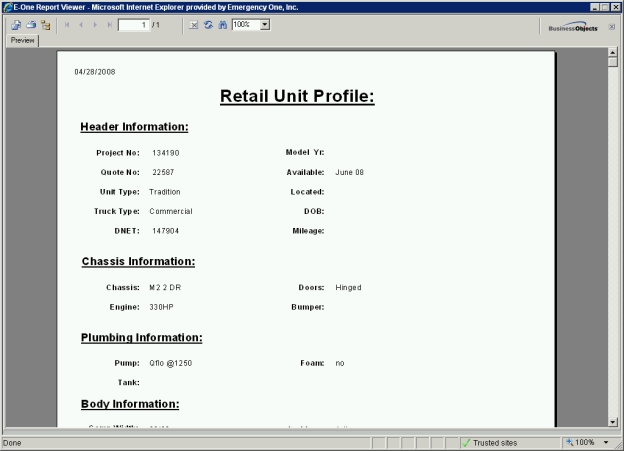
To print project profile:
Select a project, click on the Print Profile button in the details section. This will open up a window that will have a report with profile details.
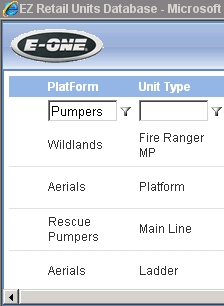
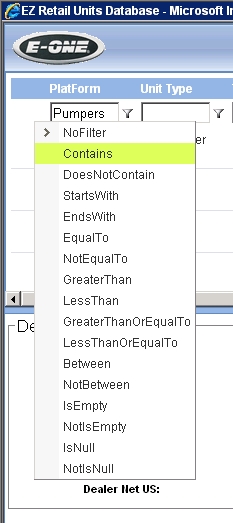
How to filter projects:
Under the header of each field is a filter box in which text can be entered.
Once the text is entered you can filter by applying a rule. You can apply a rule by clicking on the image to the right of the filter box. A drop down with a list of rules will appear. Click on any rule to apply the filter.
To remove the filter, apply the NoFilter rule.
How to sort projects:
To sort on any field, click on the header. This will order by Ascending.
Click on the field header again to order by Descending.
Click on the field header a third time to remove the sort.
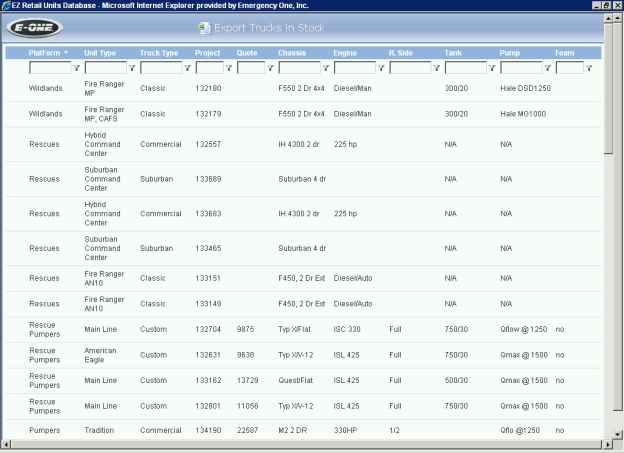
How to export to Excel:
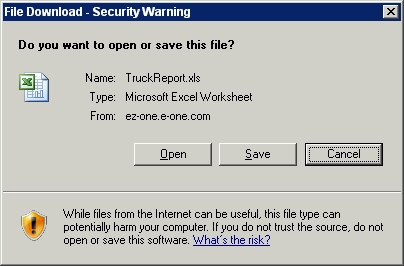
Click on the Excel icon at tip of the page labeled Export Trucks in Stock.
The File Download - Security Warning dialog box appears. Click Open.
This will export a list of all projects currently in stock to an Excel document.

How to collapse the detail and file sections:
This site is divided into three sections. The header section, detail section and the files section. The detail and file sections can each be collapsed by clicking on the arrows located on the horizontal and vertical divider bars.
Horizontal divider collapsed
Vertical divider collapsed
None of the dividers collapsed

There is a flash based tutorial demonstration available at the following link:
http://ez-one.e-one.com/training/RetailDB_Train_demo/RetailDB_Train_demo.htm
If you have any questions, feel free to contact Dee Lott at dlott@e-one.com or (352) 861-3341.
World Fire Fighting News section: This area has news stories of fire fighting events from around the world through news feeds. Clicking on a blue link displays the article in a new window.
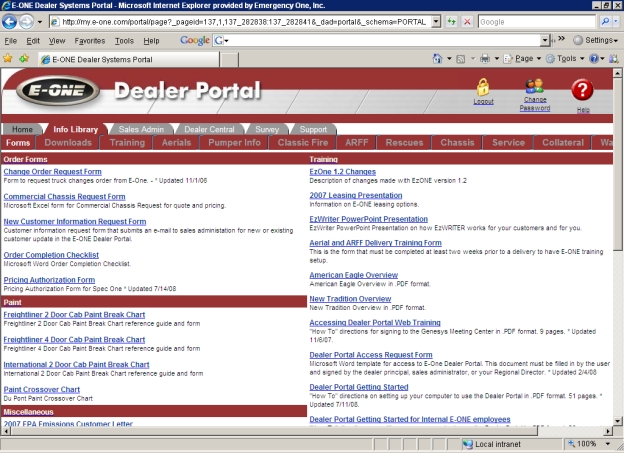
The Info Library tab displays the Info Library page. Here you will find these links on the Forms tab :
2007 Leasing Presentation
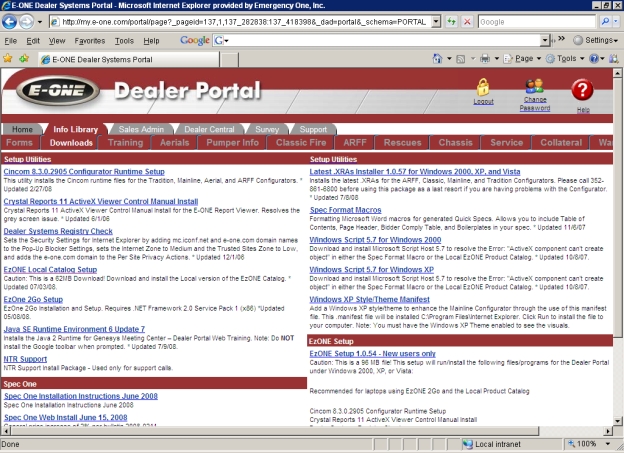
Clicking on the Info Library / Downloads tab will display these links:
Ez-One 2Go Setup 1.0.0.6
Java (TM) SE Runtime Environment 6 Update 7
Latest .XRAs Installer 1.0.61 for 2000, XP, and Vista
Windows 5.7 Script for Windows 2000
Windows 5.7 Script for Windows XP Note: You must have WinZip installed to run this application.
Windows XP Style/Theme Manifest
Spec One Web Install June 15, 2008
Spec One Installation Instructions
EzONE Setup 1.0.62 New users only
Clicking on the Training tab will display the E-ONE Training Calendar.
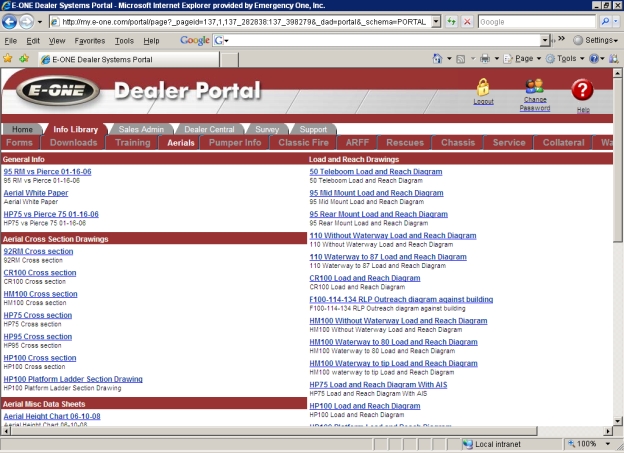
Clicking on the Aerial Info tab will display these links:
Aerial White Paper
Clicking on the Pumper Info tab will display these links:

Clicking on the Classic Fire tab This tab will display these links: FireRaider1 Configuration sheet, FireRaider2 Configuration sheet, and FireRaider3 Configuration sheet. will display these links:
FireRaider 3 Priced Order Form
FireRanger Fire Configuration sheet
FireRanger Mini Pumper Configuration sheet
FireRanger Mini Pumper Xtreme Configuration sheet
FireRanger Rescue Configuration sheet
FireRanger Rescue Raised Roof Configuration sheet
FireScout Configuration Sheet 1-11-06
FireTrooper Configuration sheet

Clicking on the ARFF tab will display these links:
ARFF Radio Survey

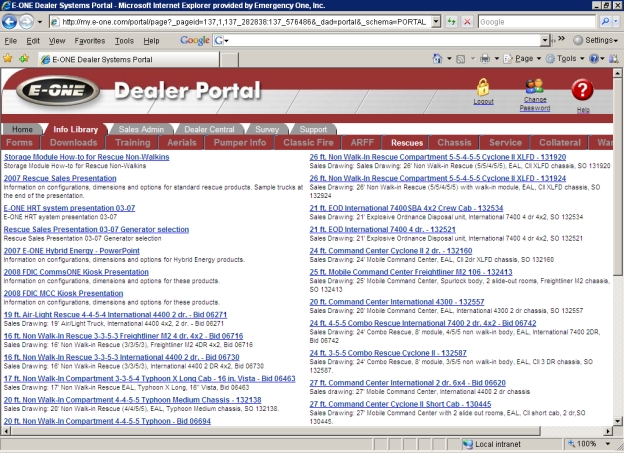
Clicking on the Rescues tab will display these links:
2008 FDIC CommsONE Kiosk Presentation
2008 FDIC MCC Kiosk Presentation
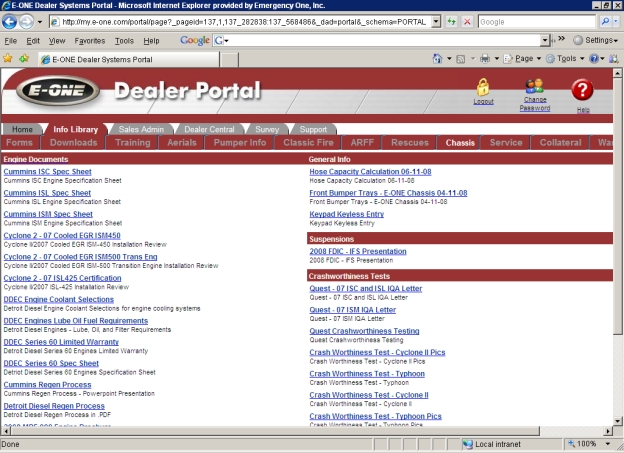
Clicking on the Chassis tab will display these links:
Cummins ISC Spec Sheet
Cummins ISL Spec Sheet
Cummins ISM Spec Sheet
Cyclone 2 - 07 Cooled EGR ISM450
Cyclone 2 - 07 Cooled EGR ISM500 Trans Eng
Cyclone 2 - 07 ISL425 Certification
DDEC Engine Coolant Selections
DDEC Engines Lube Oil Fuel Requirements
DDEC Series 60 Limited Warranty
DDEC Series 60 Spec Sheet
MBE 900 Engine Brouchure
MBE 900 Limited Warranty
Typhoon 07 ISL425 Certification
Crash Worthiness Test - Cyclone II Pics
Crash Worthiness Test - Cyclone II
Crash Worthiness Test - Typhoon Pics
Crash Worthiness Test - Typhoon
Clicking on the Service tab will display these links:
VIC Firmware Update 1.0.2823
Config.ini Extraction Procedure
Config Upload Procedure
Video Extraction Procedure
Video Deletion Procedure
Manuals Upload Procedure
VIC Manual 2008

Clicking on the Collateral tab will display these links:
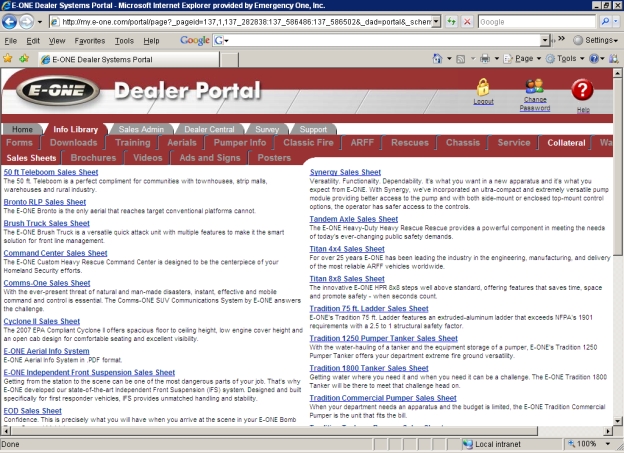
50 ft Teleboom Sales Sheet
Bronto RLP Sales Sheet
Brush Truck Sales Sheet
Aerial Sales Presentation Template - PowerPoint
ARFF Sales Presentation Template - PowerPoint
Pumper Sales Presentation Template - PowerPoint
Quick Attack Sales Presentation Template - PowerPoint
Rescue Sales Presentation Template - PowerPoint
Tanker Sales Presentation Template - PowerPoint
Tradition Sales Presentation Template - PowerPoint
Clicking on the Info Library / Collateral / Brochure tab Located on the Info Library / Collateral tab Clicking this tab will display these links: 50 ft Teleboom Sales Sheet, Bronto RLP Sales Sheet, Brush Truck Sales Sheet, Aerial Sales Presentation Template - PowerPoint, ARFF Sales Presentation Template - PowerPoint, Pumper Sales Presentation Template - PowerPoint, Quick Attack Sales Presentation Template - PowerPoint, Rescue Sales Presentation Template - PowerPoint, Tanker Sales Presentation Template - PowerPoint, Tradition Sales Presentation Template - PowerPoint, Crash Worthiness Test - Cyclone II Pics, Crash Worthiness Test - Cyclone II, Crash Worthiness Test - Typhoon Pics, and Crash Worthiness Test - Typhoon.: The links displayed are E-ONE Training Guide Brochure and Product Guide. will display these links.
E-ONE Training Guide Brochure
Product Guide
The Info Library / Collateral /Ads and Signs tab This tab contain these tabs: Advertisements, Banner Designs, Direct Mail Designs, E-ONE Logos. contain these tabs:
Advertisements
Banner Designs
Direct Mail Designs
E-ONE Logos
Clicking on the Warranties tab will display these links:
1 Year Standard
10 Year Structural
10 Year Limited Paint
15 Year Stainless Structural
20 Year Structural Warranty
Lifetime Frame
Stainless Steel Plumbing 10 Year
Warranties
Forms tab
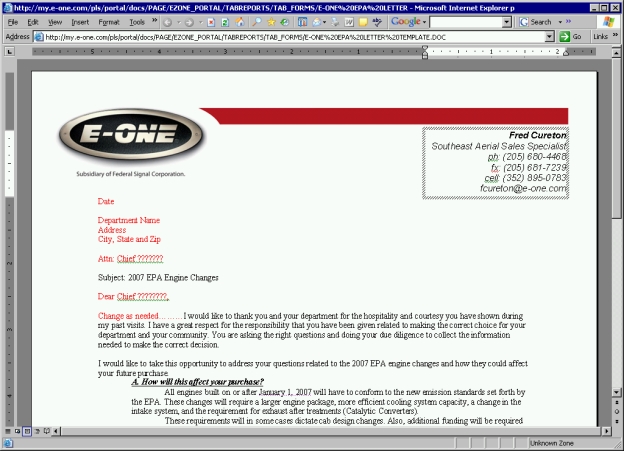
Click on the 2007 EPA Emissions Customer Letter link to generate the form. The File Download dialog box appears. Click the Open button to open the form.
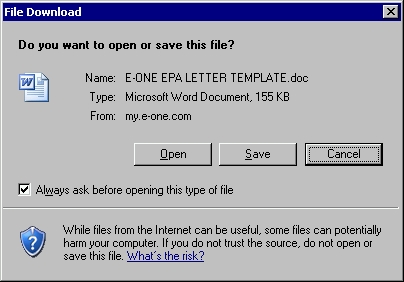
The form is downloaded and generated in Microsoft® Word®.
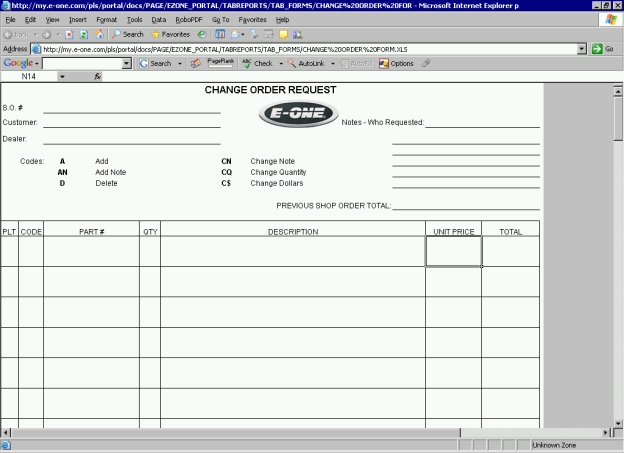
Click on the Change Order Request Form link to generate the form. The File Download dialog box appears. Click the Open button to open the form.
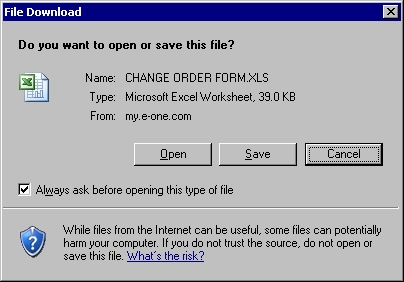
The form is downloaded and generated in Microsoft® Excel®.
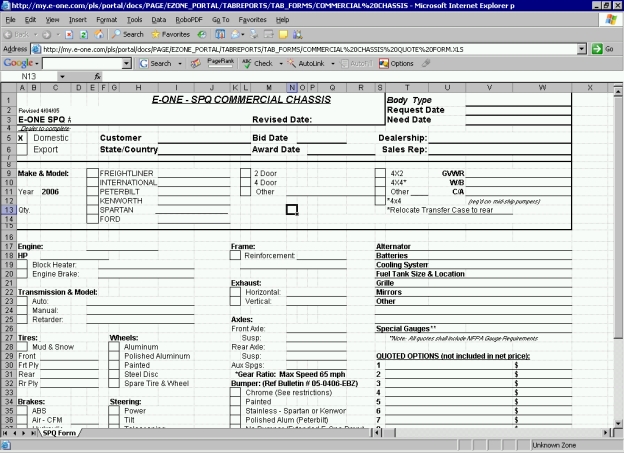
Click on the Commercial Chassis Request Form link to generate the form. The File Download dialog box appears. Click the Open button to open the form.

The form is downloaded and generated in Microsoft® Excel®. This form will need to be filled out, saved, and attached to the Files tab This tab on the quote window, allows you to add individual files to a quote. of the Quote window when a Bid Review Workflow is initiated for Mainline Products.
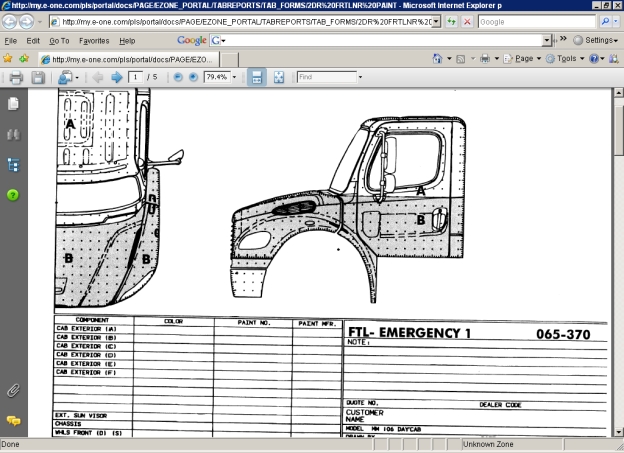
Click on the Freightliner 2 Door Cab Paint Break Chart link to open the chart in Adobe Reader.
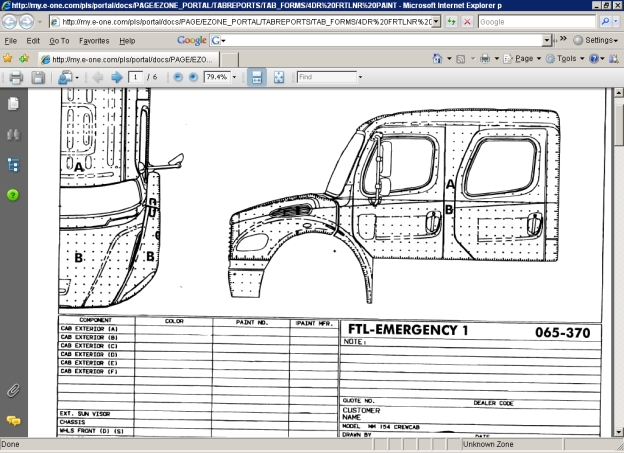
Click on the Freightliner 4 Door Cab Paint Break Chart link to open the chart in Adobe Reader.
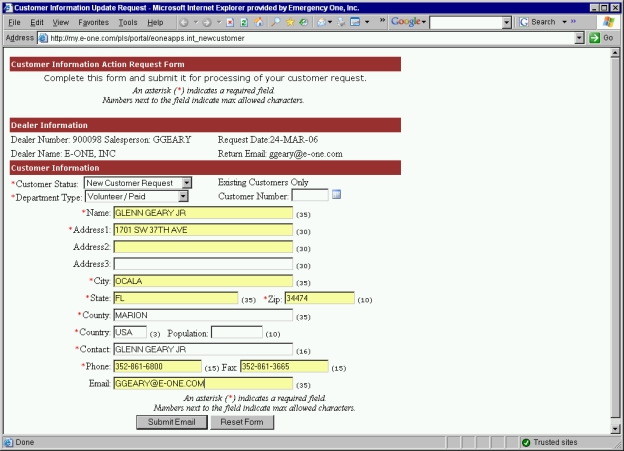
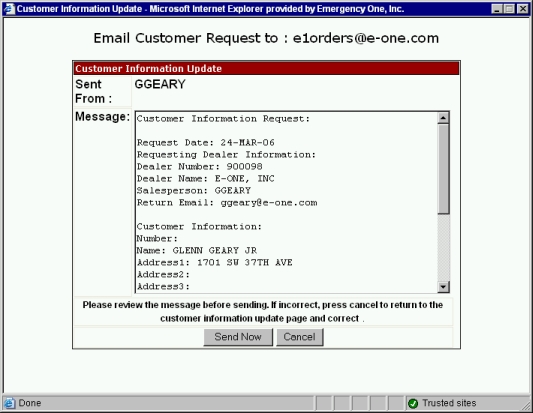
Click on the New Customer Information Request Form link to display the form in a new window. Select Customer Status and Department Type from their respective fields. Next, fill in the yellow fields and also the fields marked with an asterisk (*). Finally, click the Submit Email button to send the form or click the Reset Form button to clear all the fields and start over.
Each text field has a number beside it indicating how many characters the field will hold. E.g. The Name field will allow only 35 characters.
Note: Request your new customers or update your existing customers early. Do not wait until it is time to Workflow your order.
If you select a customer and then realize that you chose the wrong one, selecting a new customer does not clear the form before attempting to re-populate the form with new information. Click the Reset Form button before you change customers and the form will clear itself.
Once you click the Submit Email button, the Customer Information Update window appears. Click the Send Now button to send the form or Cancel to cancel the request.
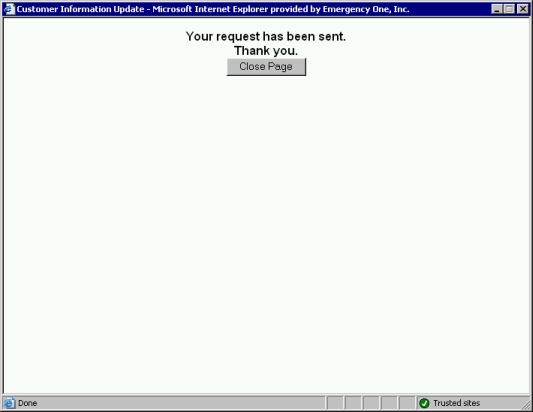
After you click the Send Now button, a message will appear stating that the request has been sent. Click the Close Page button to close the window. You will receive an e-mail that your request has been processed.
You can also click the Select Customer icon from the Customer Information Update Request window to bring up the Customer Retrieval window This window is displayed when the Selected Customer icon is clicked. and select your customer from the list. This will populate the fields and you can update the customer information in this way before submitting it.
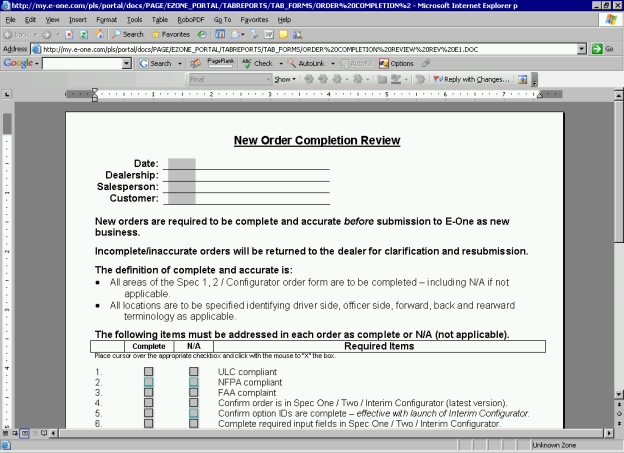
Click on the Order Completion Checklist link to generate the form. The File Download dialog box appears. Click the Open button to open the form.
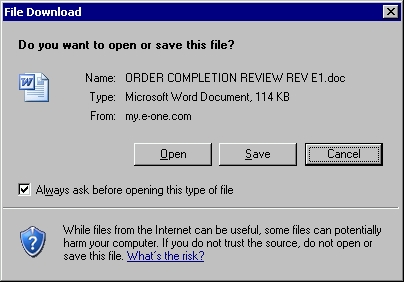
The form is downloaded and generated in Microsoft® Word®.
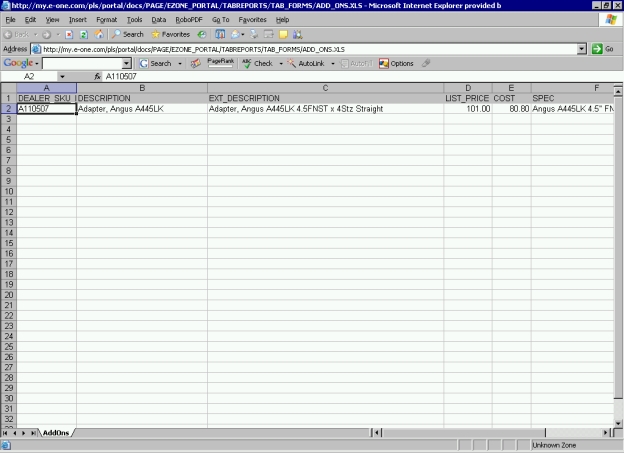
Click on the Dealer Add Ons Template link to generate the form. The File Download dialog box appears. Click the Open button to open the form.

The form is downloaded and generated in Microsoft® Excel®. This form allows dealers to enter dealer add ons, save them, and submit them to E-ONE via e1orders@e-one.com. Later, the dealer can select the dealer add ons from the Add ons tab of the Quote window and add them to the quote.
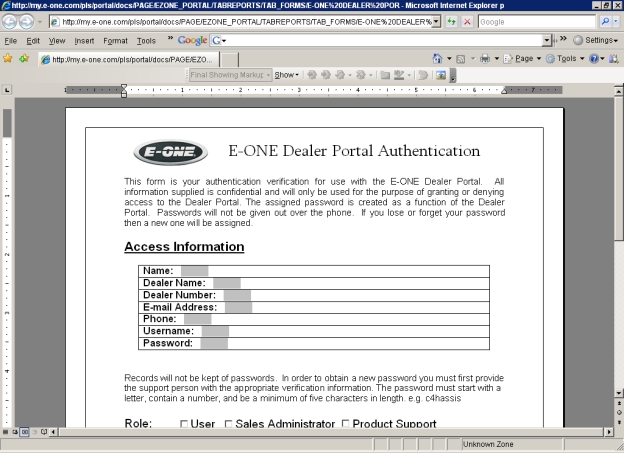
Click on the Dealer Portal Access Request link to generate the form. The File Download dialog box appears. Click the Open button to open the form.
Note: Call the Dealer Systems Support Desk at (352) 861-6800 or e-mail configuratorsupport@e-one.com to obtain the form for new sales representatives that need access.

The form is downloaded and generated in Microsoft® Word®. Fill out the form electronically for each user that needs access, save it, and e-mail it back so that the Dealer Portal Administrator can print it out and enter the user's credentials into the User Admin Tool. You can also print, fill out and fax this form to 352-861-3665. This form will be on file.
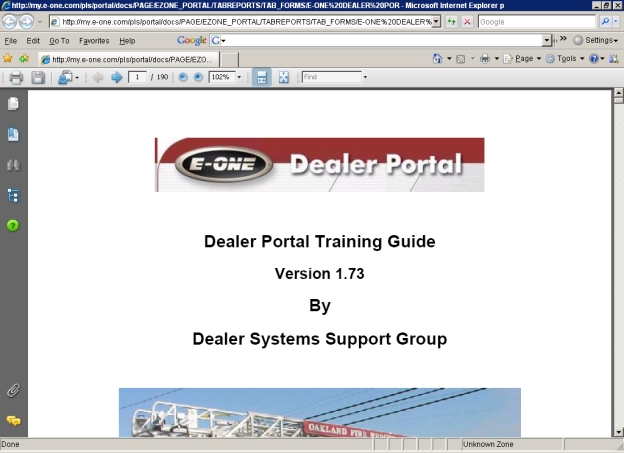
Click on the Dealer Portal Training Guide link to download the E-ONE Dealer Portal Training Guide. The E-ONE Dealer Portal Training Guide appears in Adobe® Reader. Please feel free to print out the Training Guide as a desk reference.
Click on the Dealer Portal User's Guide link to download the E-ONE Dealer Portal User's Guide. The File Download dialog box appears. Click the Open button to open the .ZIP file.

If you have WinZip® installed, the E-ONE_Dealer_Portal_User's_Guide.pdf file appears in the WinZip® window.
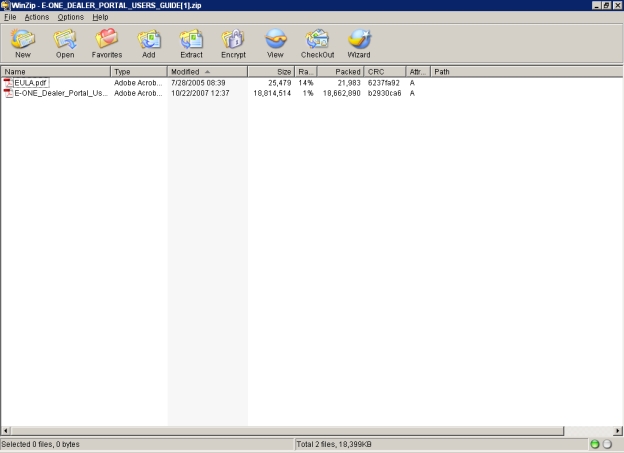
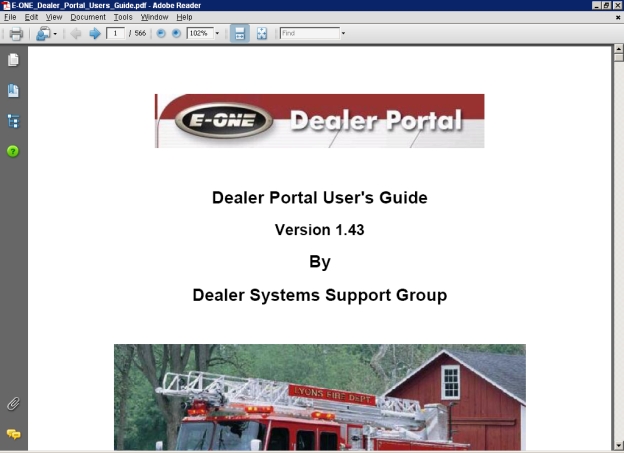
Double click on the E-ONE_Dealer_Portal_Users_Guide.pdf file and the E-ONE Dealer Portal User's Guide appears in Adobe® Reader. Please feel free to print out the User's Guide as a desk reference. Close WinZip® and Adobe® Reader when you are done.
Note: For the latest information, always refer to the online WebHelp as the Dealer Portal User's Guide doesn't get updated as frequently.
Click on the E-ONE Agreement link to generate the form. The File Download dialog box appears. Click the Open button to open the form.
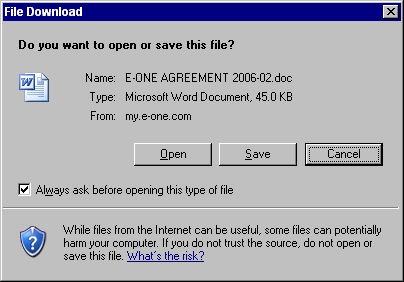
The form is downloaded and generated in Microsoft® Word®. This form will need to be attached to the Files tab of the Quote window if there is no purchase order (P.O.) number before the quote is sent to Workflow.

Click the  or Back button in Internet Explorer® to go back to the Dealer
Portal.
or Back button in Internet Explorer® to go back to the Dealer
Portal.
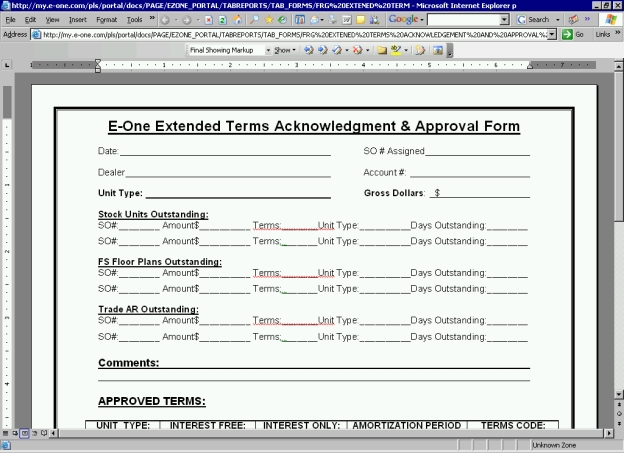
Click on the E-One Extended Terms Acknowledgment & Approval link to generate the form. The File Download dialog box appears. Click the Open button to open the form.
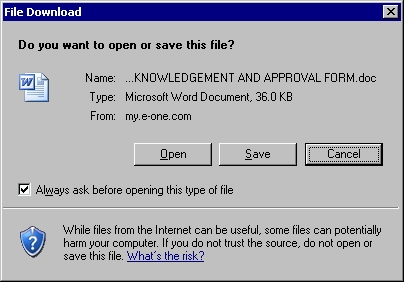
The form is downloaded and generated in Microsoft® Word®. This form will need to be filled out, saved, and attached to the Files tab of the Quote window before the quote is sent to Workflow for a Dealer Demo.
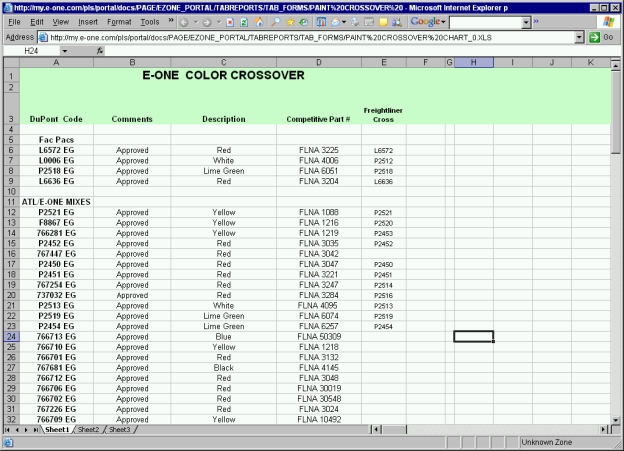
Click on the Paint Crossover Chart link to open the chart. The File Download dialog box appears. Click the Open button to open the chart in Excel.
The file is downloaded and generated in Microsoft® Excel®.
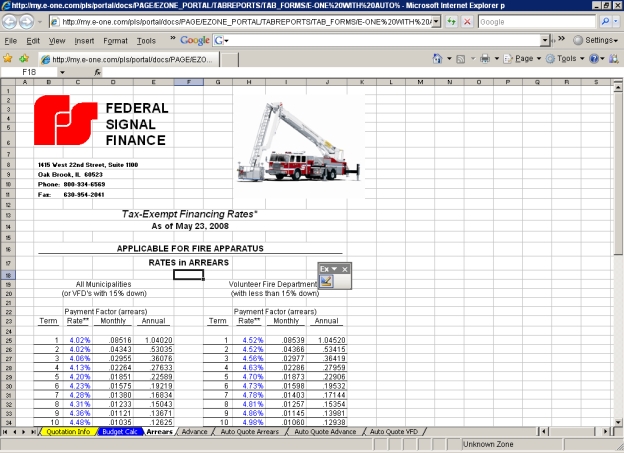
Click on the New Rate Cards - Federal Signal Leasing 5-23-2008 link to open the spreadsheet. The File Download dialog box appears. Click the Open button to open the spreadsheet in Excel.
The file is downloaded and generated in Microsoft® Excel®.
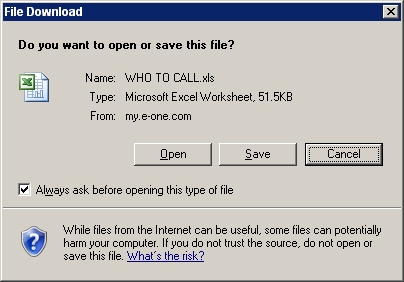
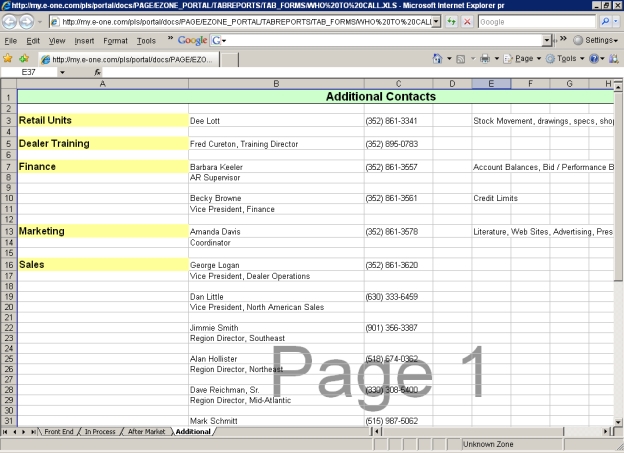
Click on the Who To Call link to open the spreadsheet. The File Download dialog box appears. Click the Open button to open the spreadsheet in Excel.
The file is downloaded and generated in Microsoft® Excel®.
Downloads tab
EzONE Setup 1.0.62 - new users only
EzONE Setup will run/install the following files/programs for the Dealer Portal under Windows 2000, XP, or Vista:
Cincom 8.4.0.6 Configurator Runtime Setup 2.0
Crystal Reports ActiveX Control Manual Install
Dealer Systems Registry Check
EzONE Local Catalog Setup 7-3-08
EzOne 2Go Setup 1.0.0.6
Java Runtime Environment (JRE) 6 Update 7
Latest .XRAs Installer 1.0.61 for Windows 2000, XP, and Vista
Spec Format Macros
Windows Script 5.7 for Windows 2000
Windows Script 5.7 for Windows XP
Log into the Dealer Portal.
Click the Info Library and Downloads tabs.
In the EzONE Setup section, click the EzONE setup link.
Click the Run or Open button.
Follow the system prompts.
If you have any problems and/or questions about this setup, call the Dealer Systems Support Group at (352) 861-6800. If you have a laptop, it is recommended to run this.
Note for new users: If you have already run the EzONE Setup from the Info Library / Downloads tab, then you wont need to run the individual programs listed below.
The Crystal Reports ActiveX Control Manual Install link will install the ActiveX control for the E-One Report Viewer. Some users may need to install this if the E-One Report Viewer doesn't display reports in its own window. Click the link to begin the install process. The File Download dialog box appears. Click the Run button to run the file.
You will see this Internet Explorer - Security dialog box. Click the Run button to continue with the software installation.
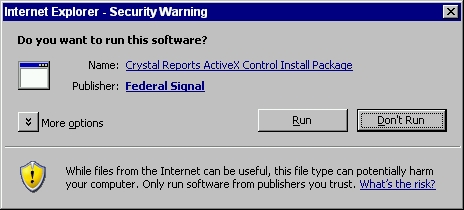
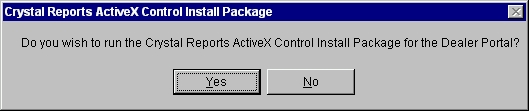
You will be prompted to install the Crystal Reports ActiveX Control Install Package. Click the Yes button to continue. You will see the InstallShield Wizard and the Command Prompt appear briefly and disappear. The software is installed.
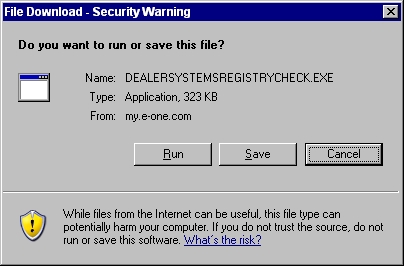
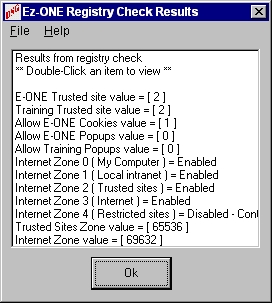
Clicking the Dealer Systems Registry Check link will do the following for Internet Explorer:
adds mc.iconf.net and e-one.com domain names to the Pop-Up Blocker Settings
sets the Internet Zone to Medium and the Trusted Sites Zone to Low
adds the e-one.com domain to the Per Site Privacy Actions
The File Download - Security Warning dialog box appears. Click the Run button.
An Internet Explorer - Security Warning dialog box appears. Click the Run button to continue.
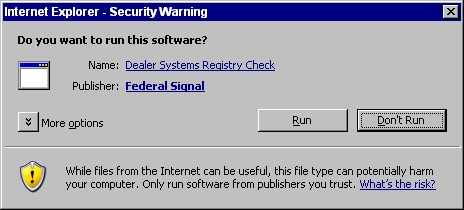
The Ez-ONE Registry Check Results dialog box appears. Click the Ok button.
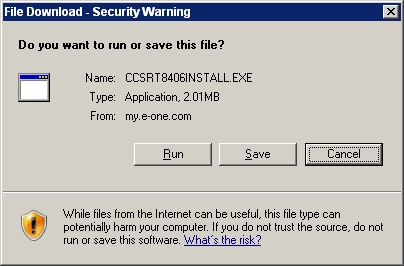
Clicking the Cincom 8.4.0.6 Configurator Runtime Setup Clicking this link from the Info Library / Download tab link will manually install the Cincom® binaries so that the Tradition, Classic, Mainline, and ARFF Configurator windows will open successfully.Configurator windows will open successfully. link will manually install the Cincom® binaries so that the Classic, Mainline, and ARFF Configurator windows will open successfully whenever any of these conditions are met:
Red wrench icon is clicked and a Product Line is selected for a new quote with no configuration
Red wrench icon is clicked for an existing quote with no configuration
Red wrench icon with an existing quote with a partial configuration such as a Mainline Product.
The green wrench icon is clicked on an existing quote with a complete configuration.
At the File Download - Security Warning dialog box, click the Run button.
Click the Yes button when prompted to install the Cincom Socrates 8.3.0.29 Runtime Install Package for the Dealer Portal.
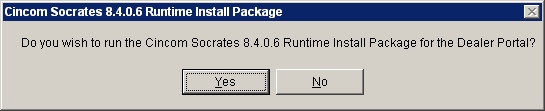
You will see the InstallShield Wizard and the Command Prompt appear briefly and then disappear. The software is installed.
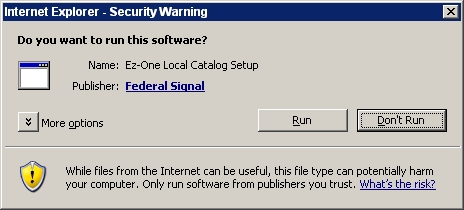
Click on the Ez-ONE Local Catalog Setup link to install the Product Catalog . The File Download - Security Warning dialog box appears. Click the Run button to install the software.
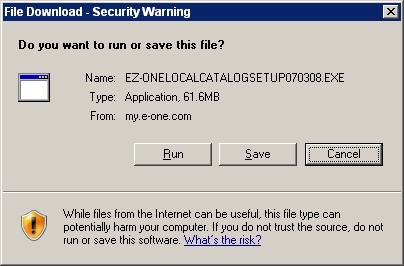
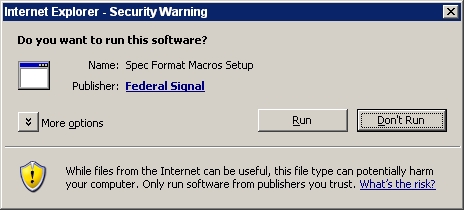
The Internet Explorer - Security Warning dialog box appears. Click the Run button to run the software.
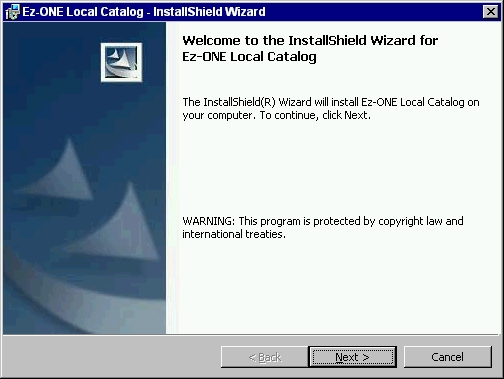
The InstallShield® Wizard appears. Click the Next button to continue the installation.
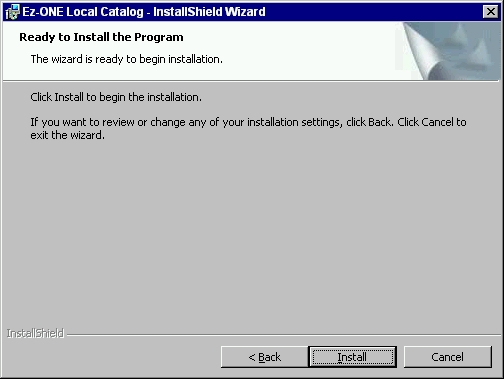
Click the Install button to begin the installation.
Click Finish to complete the installation and exit the wizard.
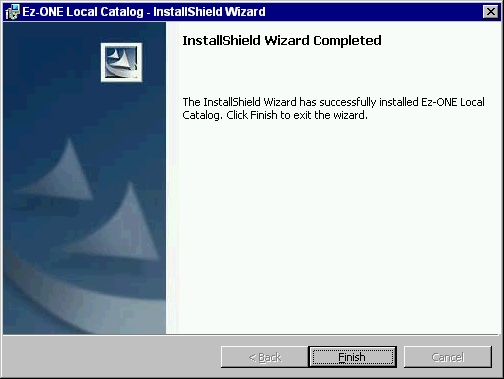
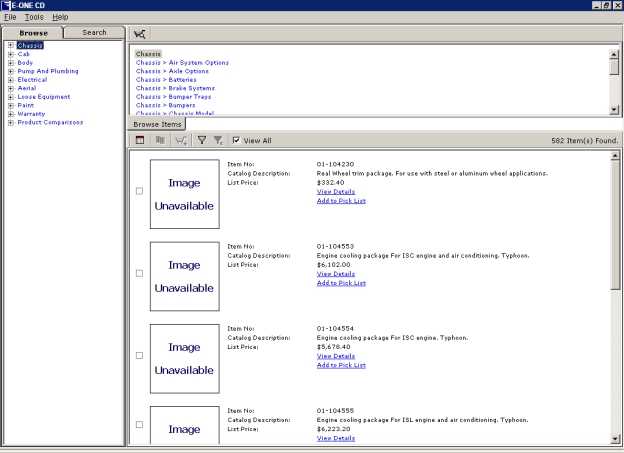
Double-click the Ez-ONE Local Catalog icon to run the Product Catalog. The E-ONE CD window appears.
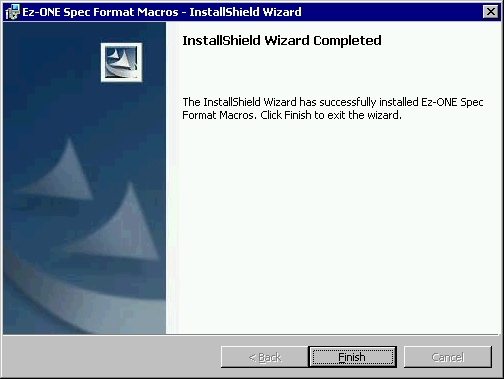
Click on the Spec Format Macros link to install the Ez-ONE Spec Format Macros in Word. The File Download - Security Warning dialog box appears. Click the Run button to run the file. This macro is for the Quick Specs section in the Reports tab of the quote window, that allows the user to generate a spec with a table of contents, page frames, bidder comply table, and boilerplates based on the selections made. A new feature allows you to add your boilerplates to the end of your spec by checking the Add Boilerplates to End of Document check box on the Specifications Attributes dialog box. Also the boilerplates are now sorted alphabetically ascending by default.

The Internet Explorer - Security Warning dialog box appears. Click the Run button to run the file.
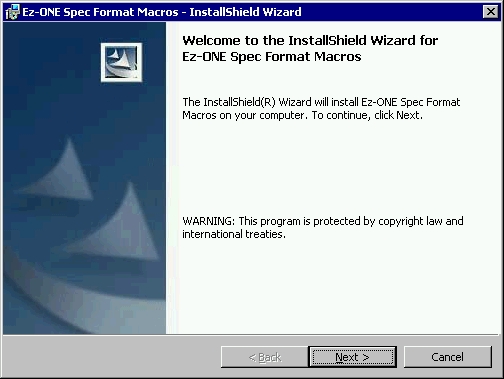
The InstallShield® Wizard appears. Click the Next button to continue the installation.
Click the Install button to begin the installation.

Click Finish to complete the installation and exit the wizard.
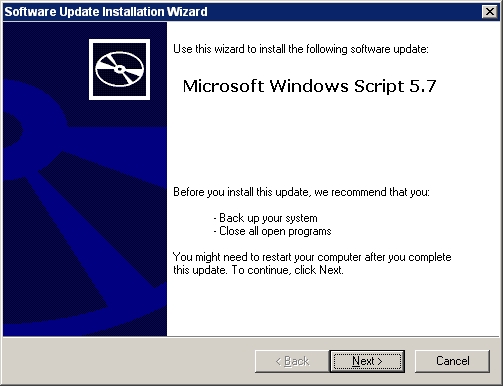
Click the Windows Script 5.7 link for Windows 2000 or XP to install the Windows Script Host. The File Download dialog box appears.
Note: Installing Windows Script 5.7 will resolve the Error: "ActiveX component can't create object" in either the Spec Format Macro or the Product Catalog.
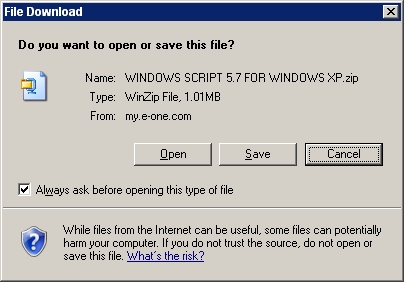
Click the Open button to open the .ZIP file. The WinZip window appears with the file Windows Script 5.7 for Windows 2000.exe or Windows Script 5.7 for Windows XP.exe displayed.
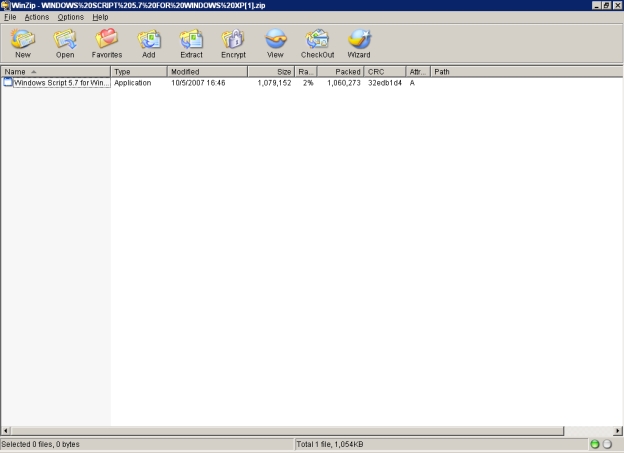
Double click the executable to install Windows Script Host. Click the Yes button to the WinZip Caution dialog box that appears.
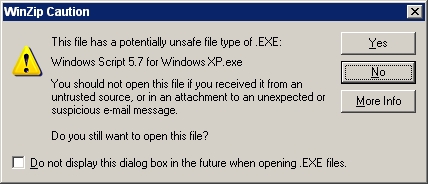
Click the Yes button to the second WinZip Caution dialog box that appears.

Click the Next button to the Software Update Installation Wizard dialog box that appears.
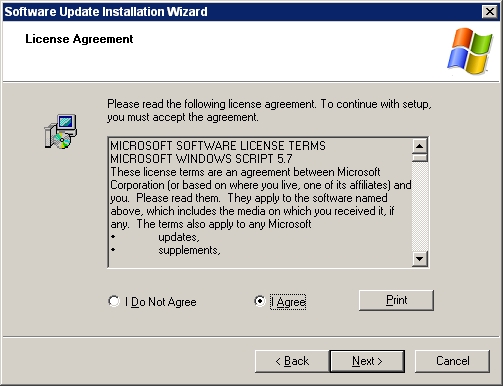
Click the I Agree radio button to accept the license agreement when the second Software Update Installation Wizard dialog box that appears. Click the Next button to continue.
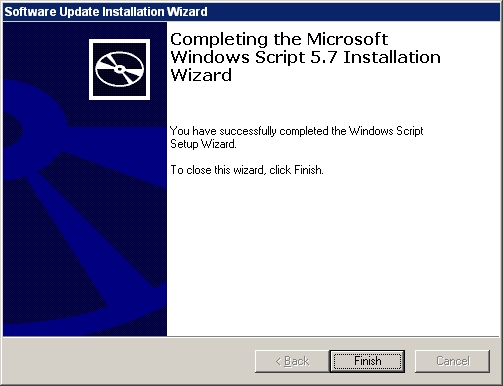
Click the Finish button to the Software Update Installation Wizard dialog box that appears.
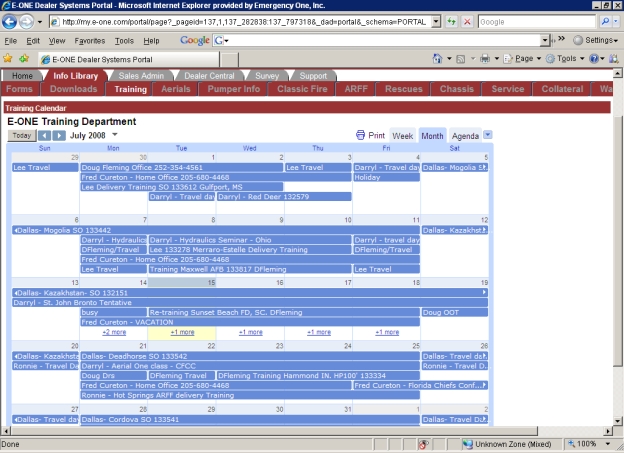
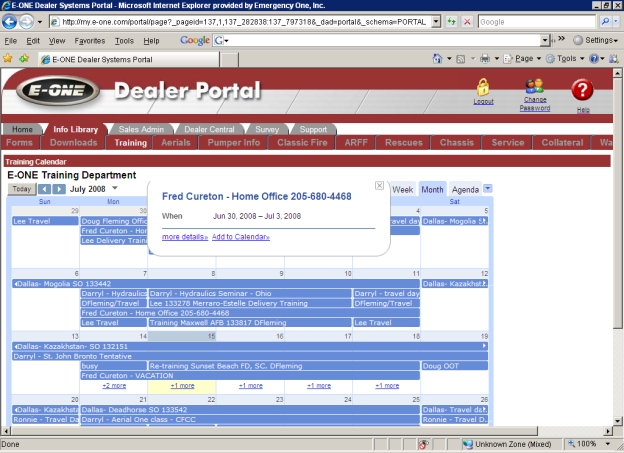
The Training tab displays the current E-ONE Training Calendar.
Clicking on a blue item will display more information.
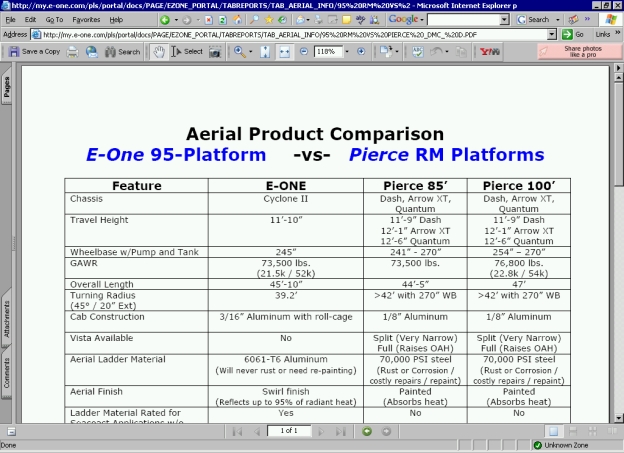
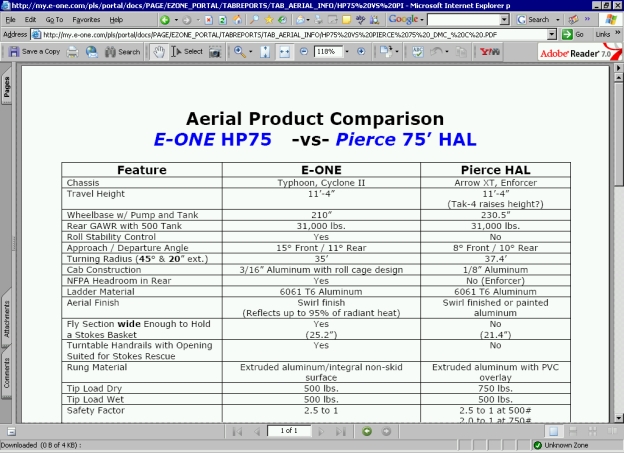
Aerial Info tab Clicking this tab from the Info Library tab will display these links: E-One 95-Platform vs. Pierce Platforms, E-One HP75 Vs. Pierce 75 HAL, and Ground Ladder Storage Guide.Info Library tab will display these links: E-One 95-Platform vs. Pierce Platforms, E-One HP75 Vs. Pierce 75 HAL, and Ground Ladder Storage Guide.
Click the 95 RM vs Pierce 01-16-06 link to generate the document. Adobe® Reader displays the document inside Internet Explorer®.
Click the HP75 vs Pierce 75 01-16-06 link to generate the document. Adobe® Reader displays the document inside Internet Explorer®.
Pumper Info tab Clicking this tab from the Info Library tab will display these links: Aluminum Pumper Configuration Guide and Stainless Pumper Configuration Guide.
Click on the 2008 FDIC IFS Pumper Kiosk Presentation link to open the document. The File Download dialog box appears. Click the Open button to open the document.
The document is downloaded and generated in Microsoft® PowerPoint®.
Click on the 2008 FDIC Synergy Kiosk Presentation link to open the document. The File Download dialog box appears. Click the Open button to open the document.
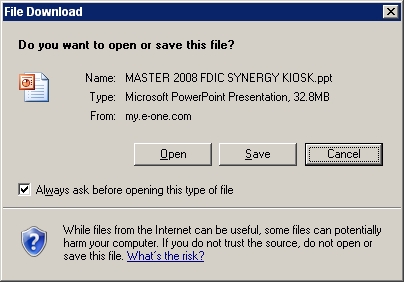
The document is downloaded and generated in Microsoft® PowerPoint®.

Click on the 2008 Tradition Pumper Presentation link to open the document. The File Download dialog box appears. Click the Open button to open the document.

The document is downloaded and generated in Microsoft® PowerPoint®.
Classic Fire tab
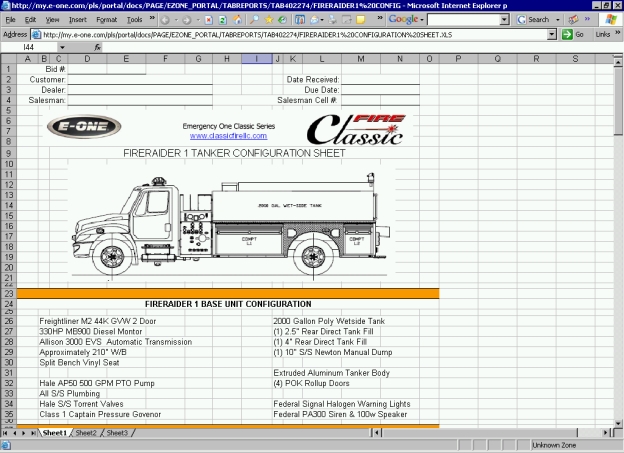
Click on the FireRaider1 Configuration sheet link to open the document. The File Download dialog box appears. Click the Open button to open the spreadsheet.

The spreadsheet is downloaded and generated in Microsoft® Excel®.
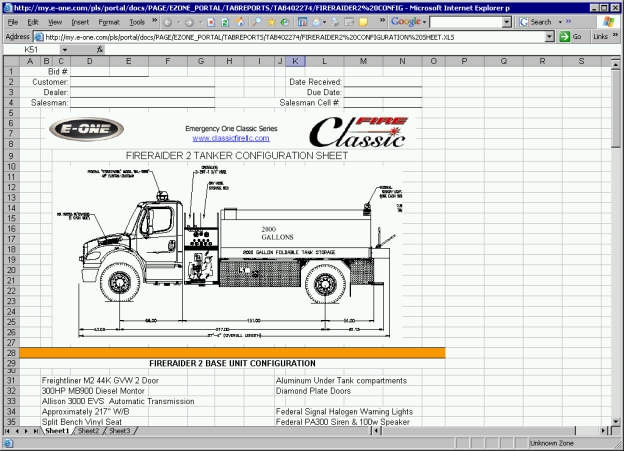
Click on the FireRaider2 Configuration sheet link to open the document. The File Download dialog box appears. Click the Open button to open the spreadsheet.
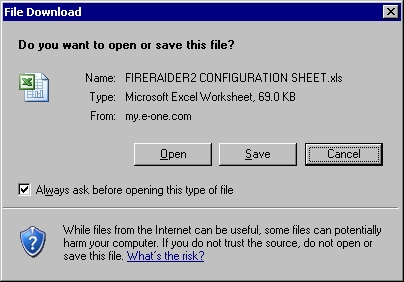
The spreadsheet is downloaded and generated in Microsoft® Excel®.
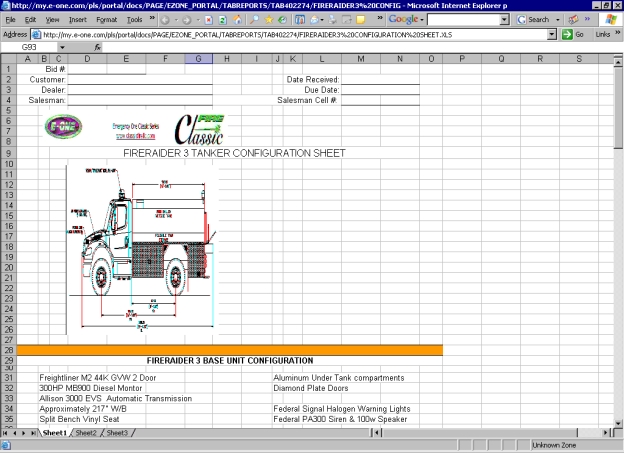
Click on the FireRaider3 Configuration sheet link to open the document. The File Download dialog box appears. Click the Open button to open the spreadsheet.
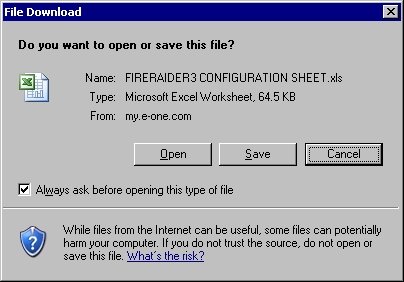
The spreadsheet is downloaded and generated in Microsoft® Excel®.
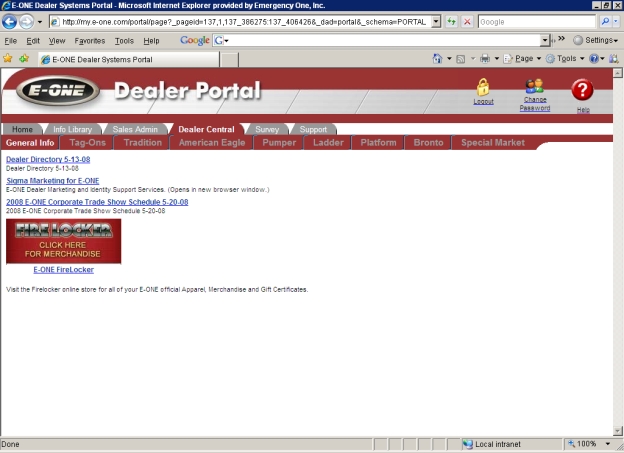
The Dealer Central tab is for the dealers to obtain information. The Sigma Marketing for E-ONE and the E-ONE Fire Locker can be viewed here from the General Info tab.
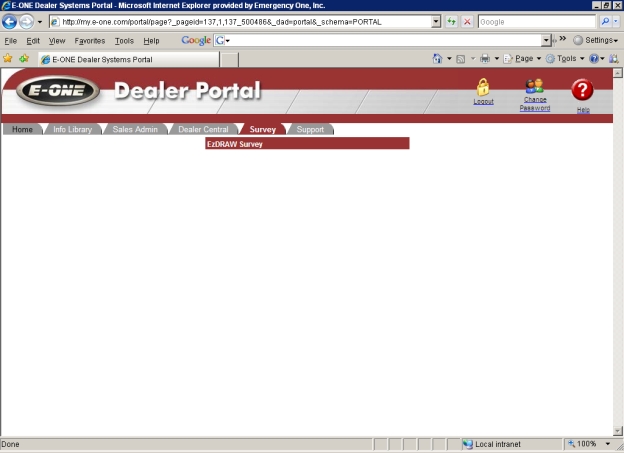
The Survey tab This tab has Rescue Product survey. has an EzDraw survey.
The Support tab Displays the Support page and the Issues and Enhancements section. Feel free to e-mail or call us if you have problems and/or questions with the Dealer Portal. E-mail: configuratorsupport@e-one.com. Phone: 352-861-6800 displays the Support page along with the Contact Support and Issues and Enhancements sections. Feel free to e-mail or call us if you have problems and/or questions with the Dealer Portal.
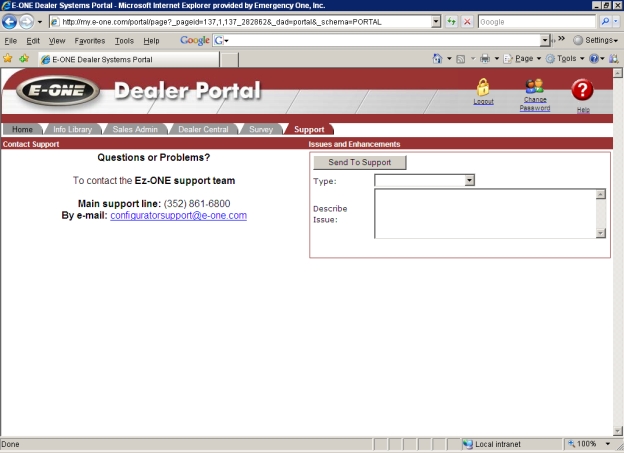
The Issues and Enhancements section allows you to submit feedback based on your Dealer Portal experience. Questions or issues submitted through the feedback from are stored in a database monitored by the Dealer Systems Support Group and are addressed in a timely fashion. This section contains a Type: drop down list, a Describe Issue: field, and the Send To E-One button Anything you enter in the Describe Issue will be saved as a record in E-ONE's database. An e-mail will be sent to the Dealer Portal Support Group..
Type: drop down list: Select one from the following:
Enhancement Request
Bug Report
Spec Problem
Configurator Issue
Security Issue
General Comment
Beta Testing Feedback (Beta testers only)
Ez-Draw Feedback
Enter the issue or comment you want to submit in the Describe Issue: field.
Select a Type: from the drop down list.
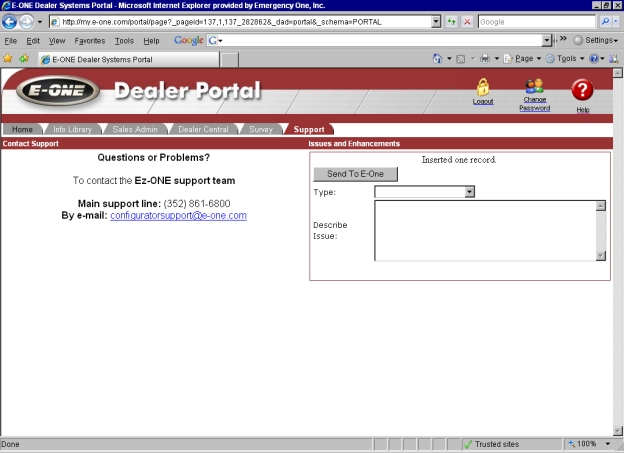
Click the Send To E-One button. The issue will be saved as a record in E-ONE's database, displayed to the Dealer Systems Support Group as an open item and an e-mail is sent to Dealer Portal Support.
Related topics:
Contact E-ONE Dealer Systems Support Group