The following tabs are available to the Sales Administration on the Dealer Portal:
Each tab is described in its own section below.
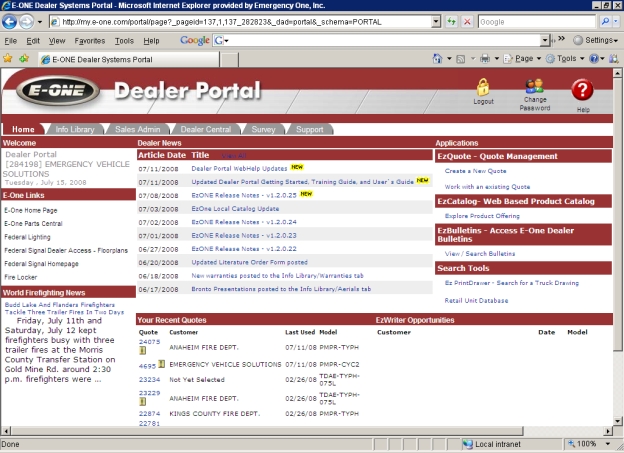
After you log in to the Dealer Portal you will be on the Home tab. The Home tab displays the Home Page of the Dealer Portal. From here you can view the recent Dealer News, Applications, Your Recent Quotes, and E-ONE links sections.
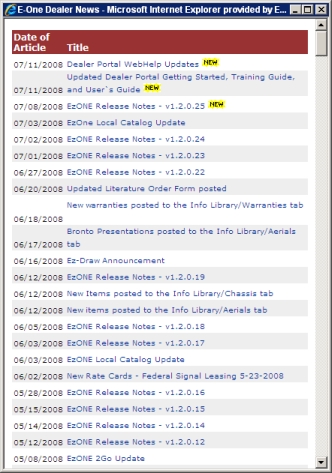
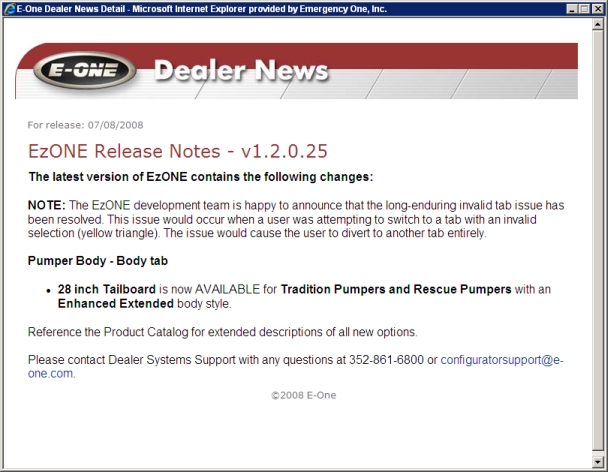
Dealer News section: This area lists all of the recent news items that are posted every week to keep the dealers informed and updated about recent changes to the sales tool. Clicking on one of the links displays a new window with a description. Clicking on the View All link displays the E-ONE Dealer News window with all past new items posted. Clicking on a news article link displays the news item in a new window.
Applications section:
EzQuote - Quote Management section: This area allows a dealer to click on the one of the following links: Create a New Quote or Work with an existing Quote.
EzCatalog - Web Based Product Catalog The Product Catalog is a database of options, grouped into detailed categories that can be searched and browsed utilizing a search engine by selecting a make and model of apparatus and "drilling down" into each category level. Items can be retrieved by selecting values for each item and search result. Finally, the attributes and properties of each item can be compared side-by-side such as sales codes, catalog descriptions, manufacturers, and list pricing. section: This section allows a dealer to Explore Product Offering using the Product Catalog
EzBulletins - Access E-One Dealer Bulletins: This sections allows dealers to View / Search Bulletins.
Search Tools section: Access Ez-ONE Active Bid drawings from Search for a Truck Drawing and the Retail Unit Database.
World Fire Fighting News section: This area has news stories of fire fighting events from around the world through news feeds. Clicking on a blue link displays the article in a new window.
Your Recent Quotes section: This area displays up to the 10 most recent quotes that have been worked by the dealer. Each quote has a number assigned to it and may have a customer picked and/or a truck configured. Clicking on the number link displays the quote window. Clicking on the View All link displays the Your Recent Quotes window with all quotes listed for the sales rep.
EzWriter Opportunities section: This area lists all the sales leads for the dealer when a department successfully completes a configuration and submits it for a quote.
View / Search Bulletins link:
Click the link to view the bulletins. The Bulletin window appears with an ID column, a Subject field and a Date field for searching.

Viewing a Bulletin
Click on an ID link a view a bulletin. The File Download dialog box appears.
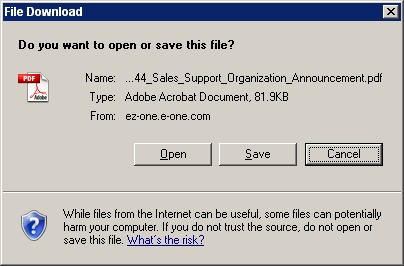
Click the Open button and the bulletin appears in Adobe Reader.
Search for a bulletin and filter the results
Each field has an input box at the bottom of each field header.
Enter text or an amount into the input box of the corresponding field in which you want to filter.
Click on the icon to the right of the input box to select the type of filter you would like to apply. Once selected the filter will be applied to the data being viewed.
It is possible to apply multiple filters by following the instructions on step 3 for any other fields in which you would like to apply a filter.
To remove a filter click on the icon to the right of the input box being used as a filter and select No Filter.
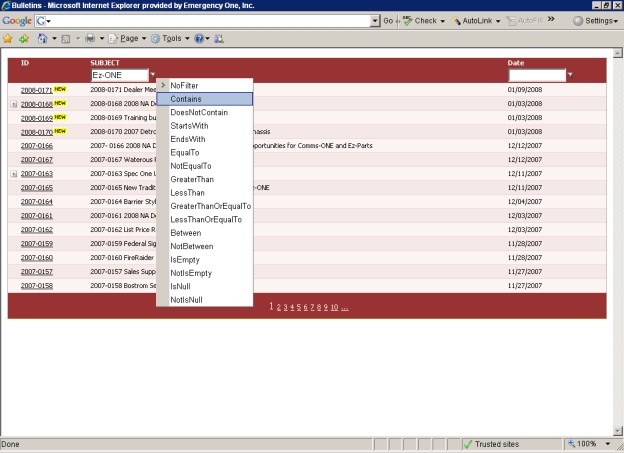
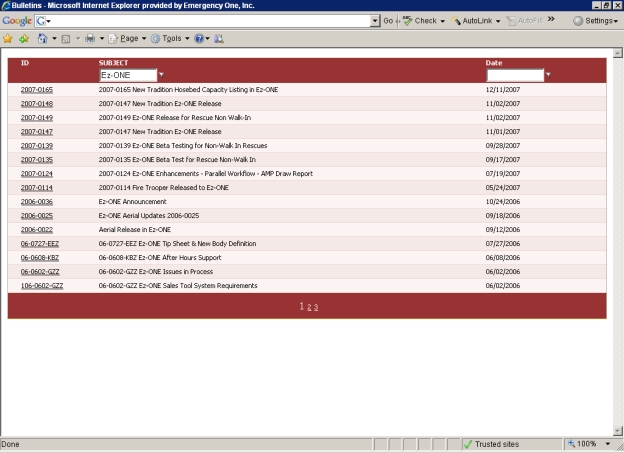
Once the filter is applied, the results will be displayed.
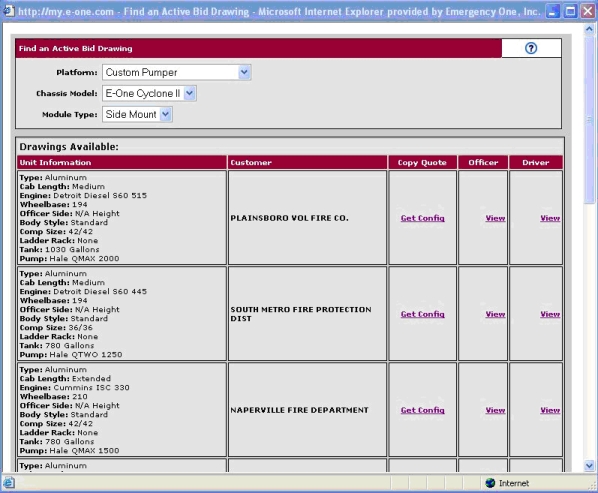
From the application section of the main Portal page: Select the Search for a Truck Drawing and a pop-up window will allow for selection of the type of truck see below:
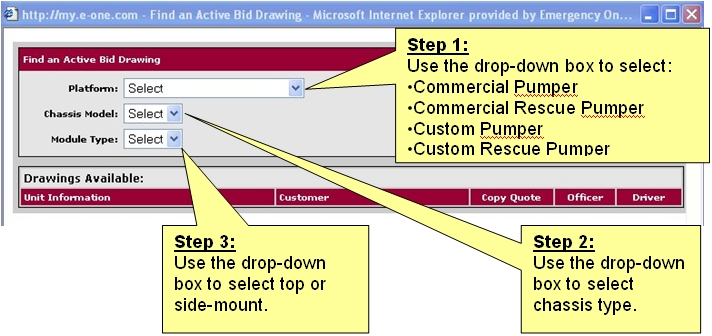
After these three steps, all trucks matching the defined criteria will be displayed (a screen capture is displayed on the next page). From here, you can view officer or driver side drawings which can be printed or saved on your computer very good tool to start a bid process or as a discussion point with a department.
The Get Config selection is where this feature really shines! The Get Config selection will bring that quote into your specific log-on and saved area and allow you to personalize the drawing and quote to your specific department. In other words, you will be able to take an existing drawing and quote, customize it for your department and be able to share drawings, specs and pricing in a matter of minutes!
We realize that each department may want to make revisions to better fit their specific needs and requirements but the Ez-ONE Team has giving us the ability to prospect and initiate early conversations, based off of existing truck specs and drawings, and in lightning-fast speed.
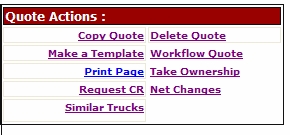
There is also a link to Ez-ONE Print Drawer in the quote header tab of the Ez-ONE. The link is labeled Similar Trucks. This link will pre populate the search criteria based on the quote you are working on.
This data will be updated daily with every EzONE-generated drawing returned from the bid review workflow. The only exception is dealer or customer-specific requests those files will not the available until the order is released.
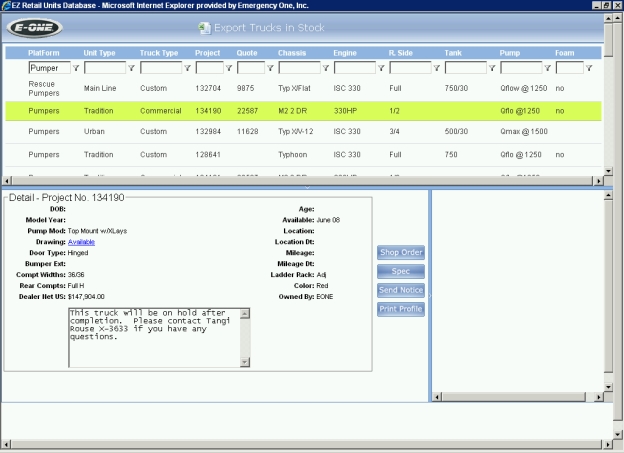
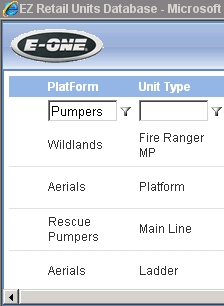
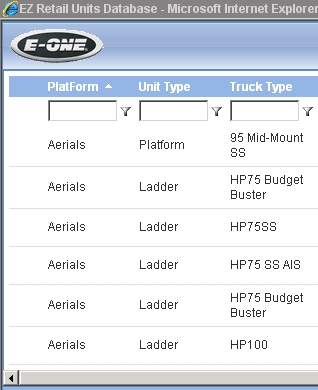
You can search the retail availability list by selecting key features.
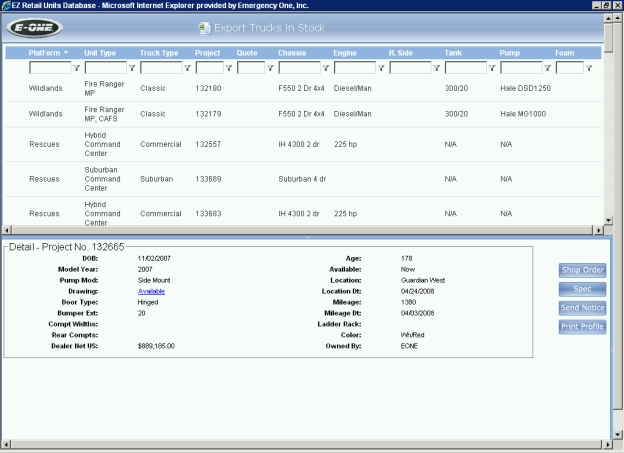
Click on the Retail Unit Database link Clicking on this link from the Dealer Portal A Web based server application that runs in Microsoft® Internet Explorer® utilizing Web services on the Internet. This application improves and simplifies your sales process. page from the Home tab Displays the Home page and the Press Releases, Dealer News from E-ONE, Your Recent Quotes, and the E-ONE links. will allow you to find a Tradition, American Eagle A Product Line selection on the EzONE Hub menu will allow the conversion of a quote from Mainline to American Eagle and back again, at any time. or Mainline retail unit and print the quote details, drawings and specifications without having to rely on internal E-One personnel.Dealer Portal page from the Home tab will allow you to find a Tradition, American Eagle or Mainline retail unit and print the quote details, drawings and specifications without having to rely on internal E-One personnel.Dealer Portal page from the Home tab will allow you to find a Tradition, American Eagle or Mainline retail unit and print the quote details, drawings and specifications without having to rely on internal E-One personnel.Dealer Portal page from the Home tab will allow you to find a Tradition, American Eagle or Mainline retail unit and print the quote details, drawings and specifications without having to rely on internal E-One personnel.Dealer Portal page from the Home tab will allow you to find a Tradition, American Eagle or Mainline retail unit and print the quote details, drawings and specifications without having to rely on internal E-One personnel. found on your Dealer Portal home page.
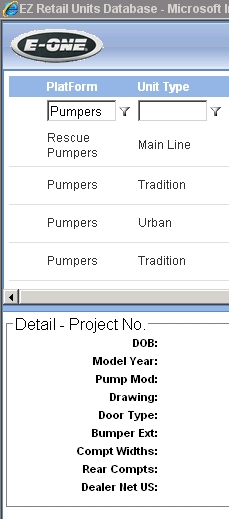
To View Detail Information:
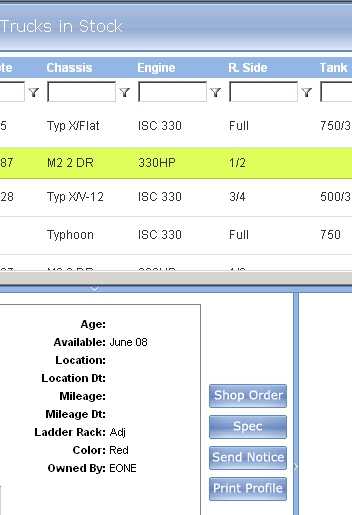
Click on any row in the table.
Once selected the row will be highlighted in light green.
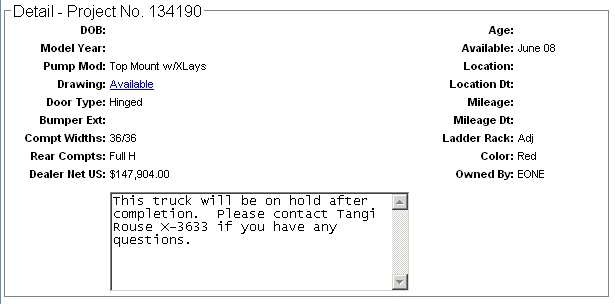
In the detail section, the project (SO) number will appear as well as other basic information. In addition, any files associated with this project will appear in lower right hand window next to the detail window.
To View a Drawing:
If there is a drawing available for the selected project, a hyperlink showing Available will appear next to the Drawing: label in the detail section.
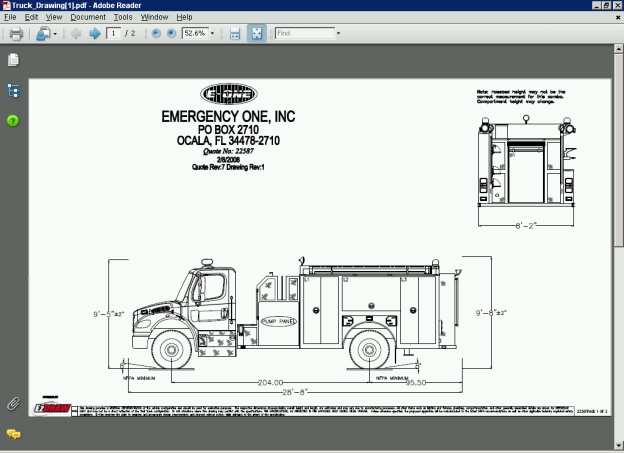
Click on the link to open a .PDF file containing the specified drawing.
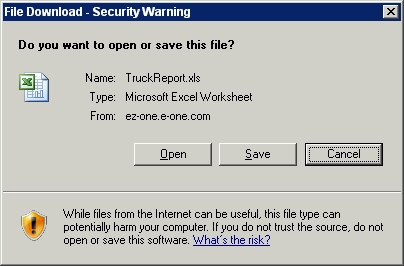
The File Download - Security Warning dialog box appears. Click Open to view the drawing.
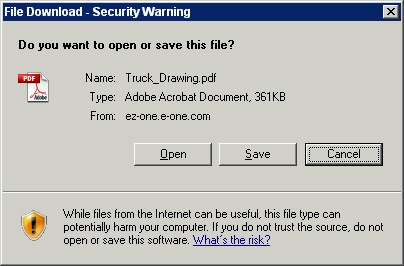
The drawing is rendered in Adobe Reader.
To view a shop order:
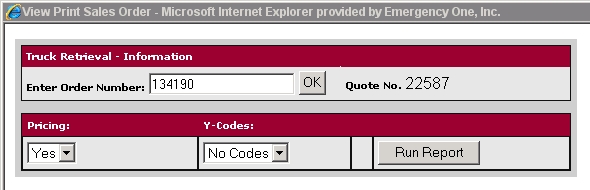
Select a project, click on the Shop Order button in the detail section. This will open up the View Print Sales Order page.
Click the Run Report button Generate a quote from the Reports tab The Reports tab on the quote window, allows you to generate twelve quick quotes, four quick specifications, seven reports, four forms, a Turning Radius report, an AMP Draw report, and a cover page. of the EzQuote window.Reports tab of the EzQuote window.Reports tab of the EzQuote window.Reports tab of the EzQuote window.Reports tab of the EzQuote window. to view the sales order detail.
To view a project spec:
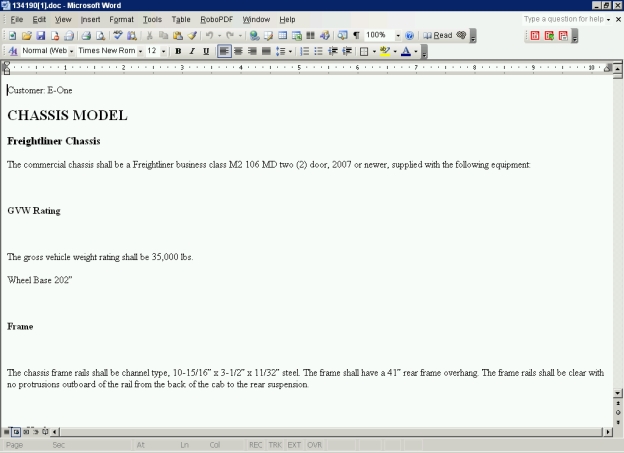
Select a project, click on the Spec button in the detail section. This will open up a word document listing the spec of the project selected.
The File Download dialog box appears. Click Open to view the spec.
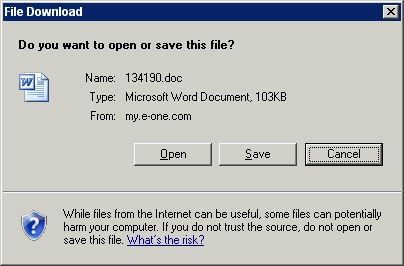
The spec appears in Word.
To send a notice or inquire about a project to the EZ Retail Units Database Administrator:
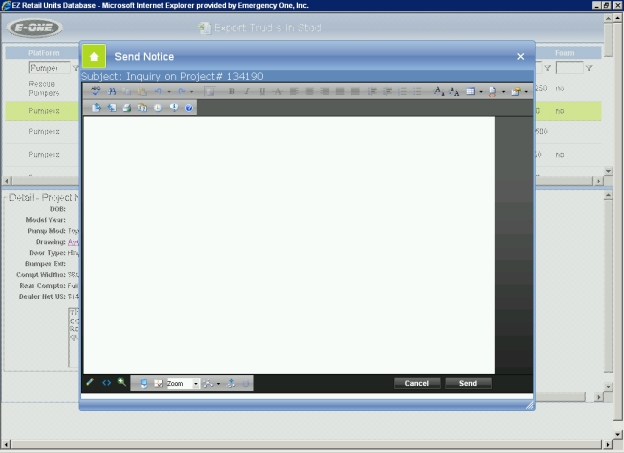
Select a project, click on the Send Notice button in the details section. This will open up a window that will have a WYSIWYG type editor with a subject heading that will identify the truck you are inquiring about.
Add notes to the text section of the window and click on the Send button to send the message to the administrator or click on Cancel to cancel the message.
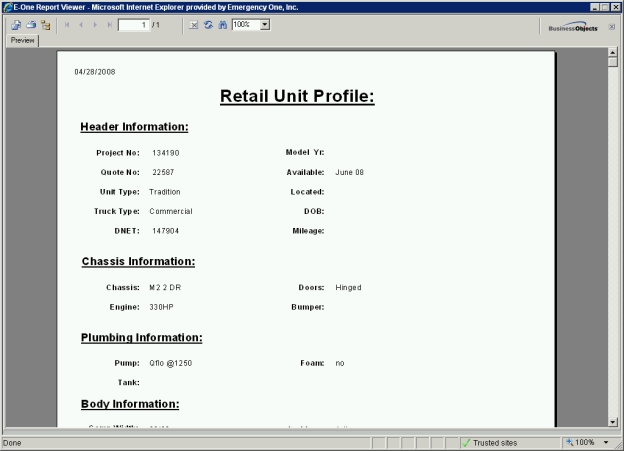
To print project profile:
Select a project, click on the Print Profile button in the details section. This will open up a window that will have a report with profile details.
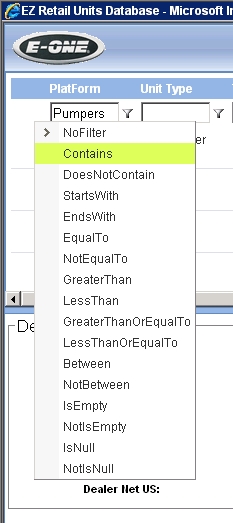
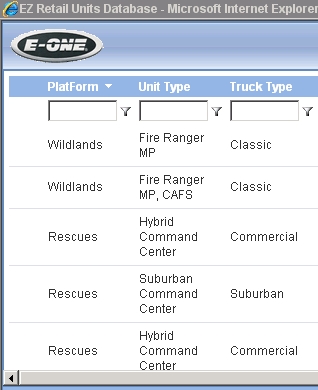
How to filter projects:
Under the header of each field is a filter box in which text can be entered.
Once the text is entered you can filter by applying a rule. You can apply a rule by clicking on the image to the right of the filter box. A drop down with a list of rules will appear. Click on any rule to apply the filter.
To remove the filter, apply the NoFilter rule.
How to sort projects:
To sort on any field, click on the header. This will order by Ascending.
Click on the field header again to order by Descending.
Click on the field header a third time to remove the sort.
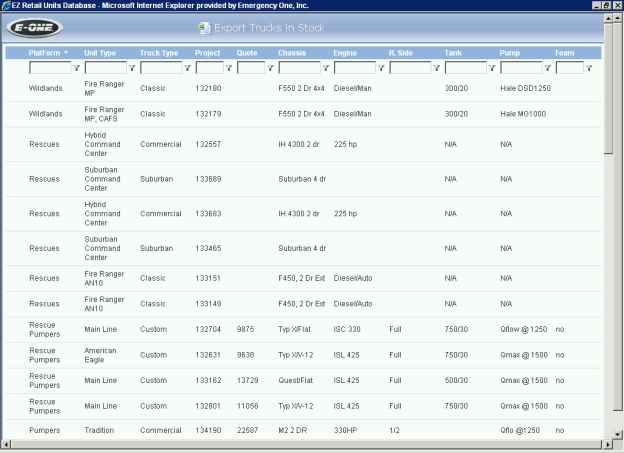
How to export to Excel:
Click on the Excel icon at tip of the page labeled Export Trucks in Stock.
The File Download - Security Warning dialog box appears. Click Open.
This will export a list of all projects currently in stock to an Excel document.

How to collapse the detail and file sections:
This site is divided into three sections. The header section, detail section and the files section. The detail and file sections can each be collapsed by clicking on the arrows located on the horizontal and vertical divider bars.
Horizontal divider collapsed
Vertical divider collapsed
None of the dividers collapsed

There is a flash based tutorial demonstration available at the following link:
http://ez-one.e-one.com/training/RetailDB_Train_demo/RetailDB_Train_demo.htm
If you have any questions, feel free to contact Dee Lott at dlott@e-one.com or (352) 861-3341.
World Fire Fighting News section: This area has news stories of fire fighting events from around the world through news feeds. Clicking on a blue link displays the article in a new window.

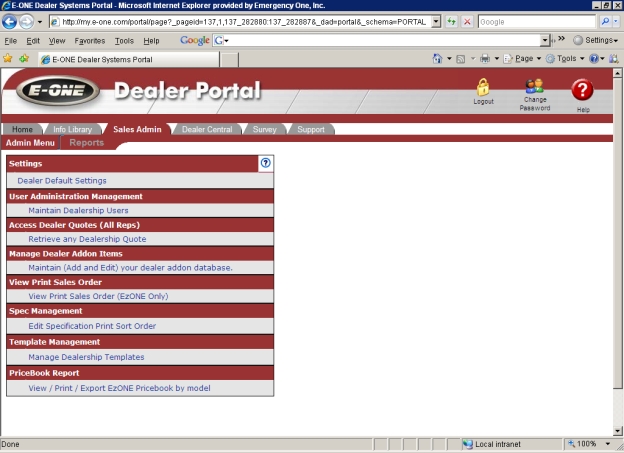
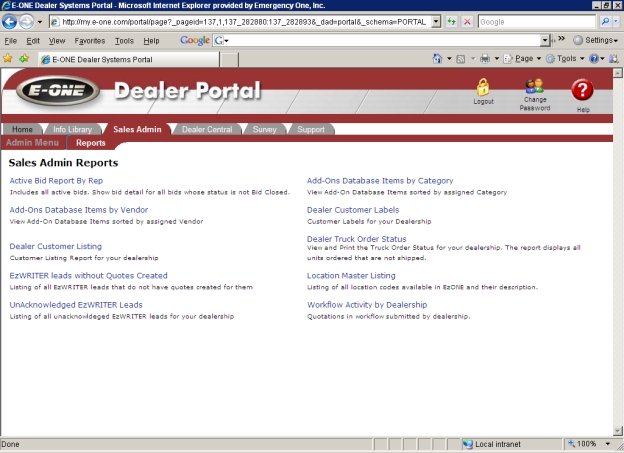
The Sales Admin tab Displays the Sales Admin page and Settings, User Administration Management, Access Dealer Quotes (All Reps), and Template Management sections. This tab is for Sales Administration only. displays the Sales Admin page. On this tab is the Admin Menu tab with items as follows:
Settings and Dealer Default Settings link
User Administration Management and Maintain Dealership Users link
Access Dealer Quotes (All Reps) and Retrieve any Dealership Quote link
Manage Dealer Addon Items and Maintain (Add and Edit) your dealer addon database link
View Print Sales Order and View Print Sales Order (EzONE Only) link
Spec Management and Edit Specification Print Sort Order link
Template Management and Manage Dealership Templates link
Pricebook Report and View / Print / Export EzONE Pricebook by model link
Also available is the Reports tab.
Under the Settings section, click on the Dealer Default Settings link to access the settings. The Dealer Defaults window appears.
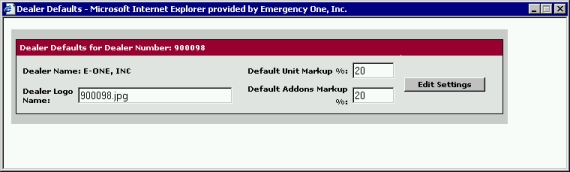
The Dealer Defaults windows consists of four fields and one button:
Dealer Name field: This area is automatically filled with your dealer name.
Default Unit Markup % field: Enter the percentage to adjust the markup (i.e. 20). This will markup the unit cost by twenty percent and will be reflected in the Dealer Markup $: and Markup %: fields on the financial tab Displays the monetary values and information associated with the quote along with the Quote Number, Information Requiring Approval and the Adjustment sections. of the quote. Setting the value to 0 will result in cost (Dealer Net) or no markup.
Dealer Logo Name: The name of your dealer logo that will appear on the quote and the spec and is automatically filled in.
Default Addons Markup %: field: Enter the percentage to adjust the markup. (i.e. 20). This will markup the add-ons cost by twenty percent and will be reflected in the Dealer Adds Cost $: and Adds Markup %: fields on the financial tab Displays the monetary values and information associated with the quote along with the Quote Number, Information Requiring Approval and the Adjustment sections. of the quote. Setting the value to 0 will result in cost (Dealer Net) or no markup.
Edit Settings button: Click this button and the changes made will be applied to the quote. Click the 'X' in the upper right hand corner to close the window.
Under the User Administration Management section, click on the Maintain Dealership Users link to access the settings. The Manage Users window appears displaying all active users and the users' names, usernames, e-mail addresses, and status.
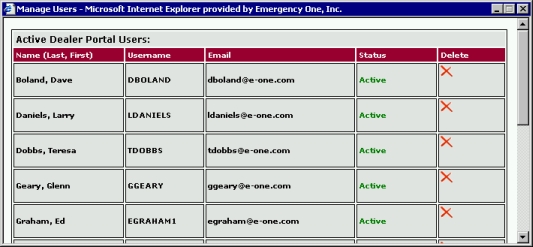
Click the red 'X' icon in the Delete section to delete the user from the Dealer Portal if the user is no longer with the dealer. Click the 'X' in the upper right corner to close the Manage Users window.

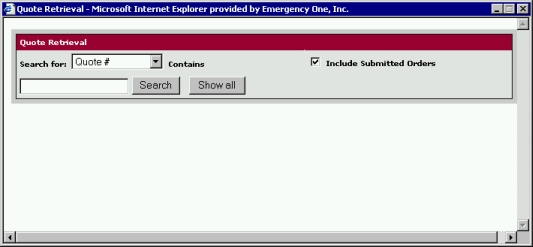
Under the Access Dealer Quotes (All Reps) section, click the Retrieve any Dealership Quote link to retrieve a quote.
The Quote Retrieval window appears and consists of one drop down list, one check box, one search field, and two buttons.
Search for: field: Click the drop down list arrow and select from the following search criteria; Quote #, Customer Name, Bid #, or Dealer Ref #.
Include Submitted Orders: Check this box if you want submitted orders to be included in the search results.
Search button: Enter in the search field the quote number, customer name, bid number, or dealer reference number based on what you selected in the Search for: field.
Show all button: Click this button and all possible results are displayed in the Search Results window below.
In this example, Quote # is chosen, the Include Submitted Orders check box is checked, the Show all button is clicked, and all the possible quotes are listed in the Search Results.
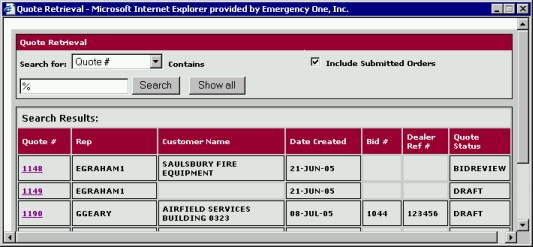
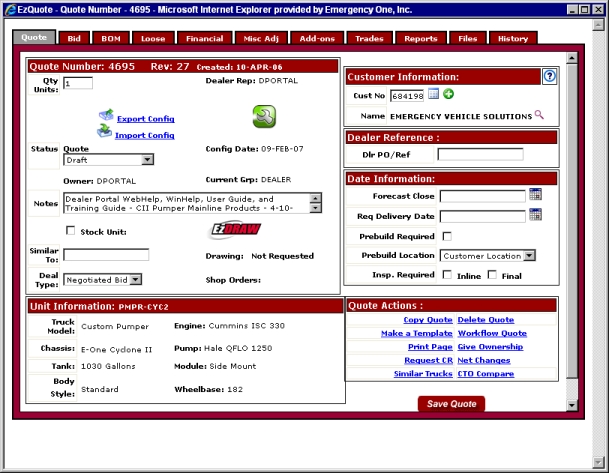
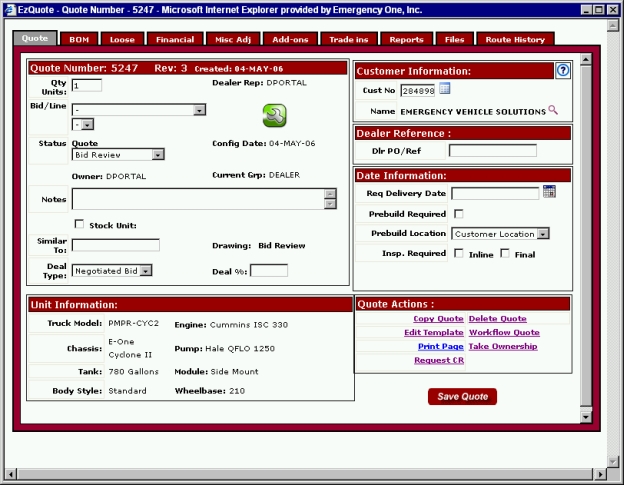
Click on the Quote # link, the EzQuote window Displays the Quote Number:, Unit Information:, Customer Information:, Dealer Reference:, Date Information: and Quote Actions: sections. appears with the quote number, and you are back on the Quote tab Displays the Quote Number:, Unit Information:, Customer Information:, Dealer Reference:, Date Information: and Quote Actions: sections on the quote window Displays the Quote Number:, Unit Information:, Customer Information:, Dealer Reference:, Date Information: and Quote Actions: sections... Click the 'X' in the upper right corner to close the Quote Retrieval window.
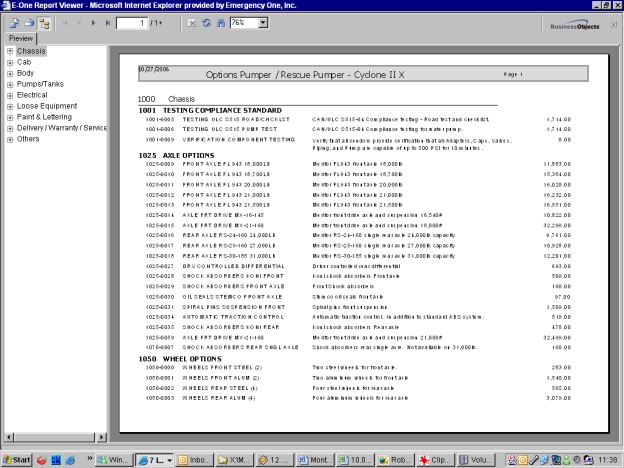
Under the Settings section, click on the View Print Sales Order (EzONE Only) link. The View Print Sales Order window appears.
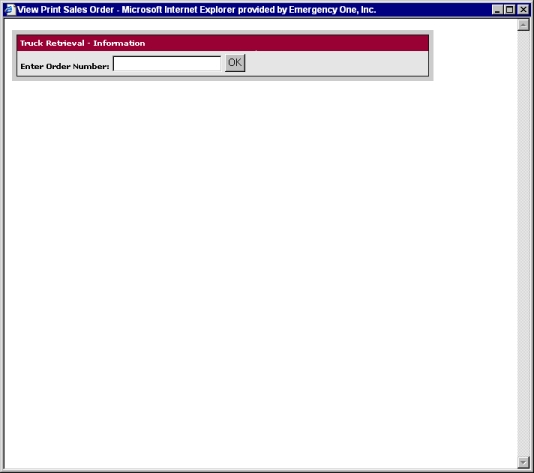
Enter a shop order number in the field and click the OK button.
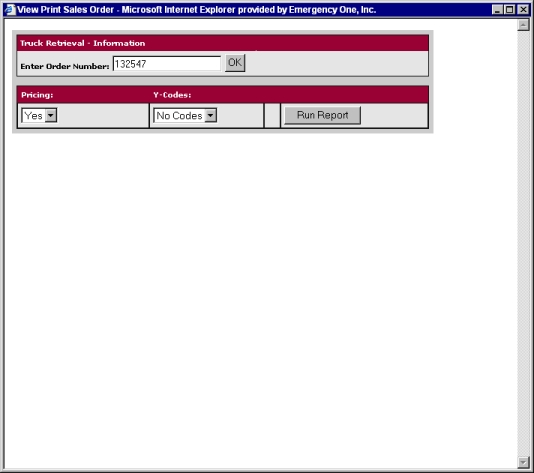
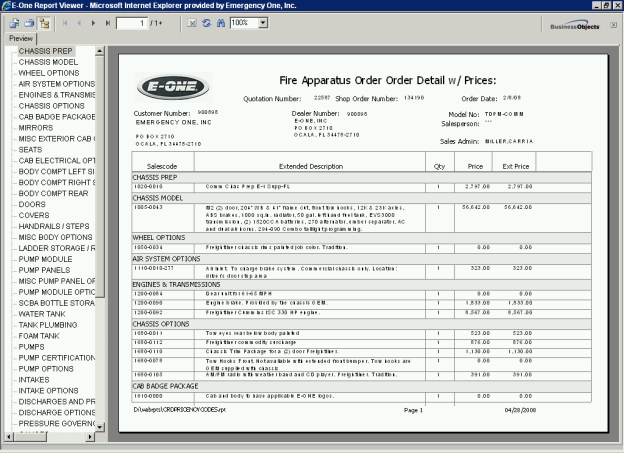
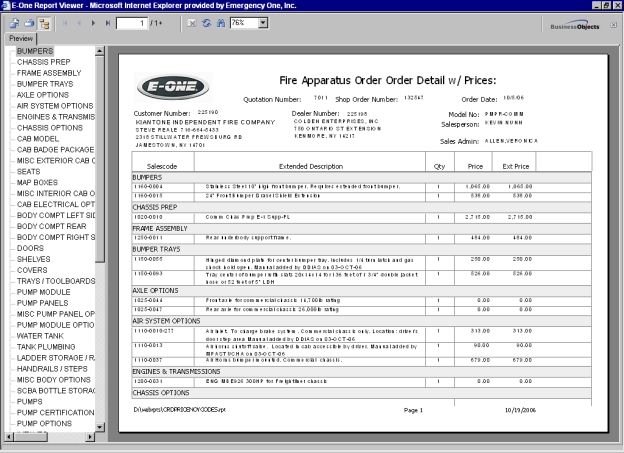
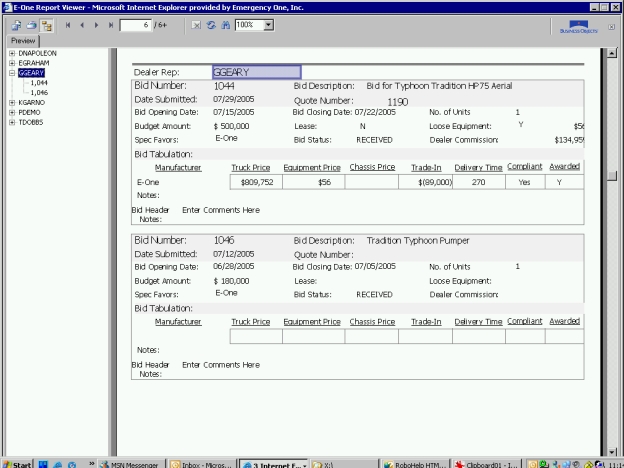
Select Yes or No from the Pricing drop down list, select Yes or No for Y-Codes, and click the Run Report button . The E-One Report Viewer appears with the generated report.
Under the Spec Management section Contains the Edit Specification Print Sort Order link When this link is clicked, from the Sales Admin tab, the Manage Spec Sorting window appears and allows you to sort the specification sections in each category.Sales Admin tab Displays the Sales Admin page and Settings, User Administration Management, Access Dealer Quotes (All Reps), and Template Management sections. This tab is for Sales Administration only., the Manage Spec Sorting window When the Edit Specification Print Sort Order link is clicked, from the Spec Management section of the Sales Admin tab, this window is displayed and allows you to sort the specification sections in each category. appears and allows you to sort the specification sections in each category.Sales Admin tab , the Manage Spec Sorting window appears and allows you to sort the specification sections in each category.Sales Admin tab , the Manage Spec Sorting window appears and allows you to sort the specification sections in each category.Sales Admin tab , the Manage Spec Sorting window appears and allows you to sort the specification sections in each category.Sales Admin tab , the Manage Spec Sorting window appears and allows you to sort the specification sections in each category.Sales Admin tab , the Manage Spec Sorting window appears and allows you to sort the specification sections in each category.Sales Admin tab , the Manage Spec Sorting window appears and allows you to sort the specification sections in each category.Sales Admin tab , the Manage Spec Sorting window appears and allows you to sort the specification sections in each category.Sales Admin tab , the Manage Spec Sorting window appears and allows you to sort the specification sections in each category.Sales Admin tab , the Manage Spec Sorting window appears and allows you to sort the specification sections in each category.Sales Admin tab , the Manage Spec Sorting window appears and allows you to sort the specification sections in each category.Sales Admin tab , the Manage Spec Sorting window appears and allows you to sort the specification sections in each category.m the Sales Admin tab, the When the Edit Specification Print Sort Order link is clicked, from the Spec Management section Contains the Edit Specification Print Sort Order link. of the Sales Admin tab , this window is displayed and allows you to sort the specification sections in each category. Manage Spec Sorting window appears and allows you to sort the specification sections in each category.Manage Spec Sorting window appears and allows you to sort the specification sections in each category.Manage Spec Sorting window appears and allows you to sort the specification sections in each category.Manage Spec Sorting window appears and allows you to sort the specification sections in each category.Manage Spec Sorting window appears and allows you to sort the specification sections in each category.Manage Spec Sorting window appears and allows you to sort the specification sections in each category.Manage Spec Sorting window appears and allows you to sort the specification sections in each category.Manage Spec Sorting window appears and allows you to sort the specification sections in each category.Manage Spec Sorting window appears and allows you to sort the specification sections in each category.Manage Spec Sorting window appears and allows you to sort the specification sections in each category.Manage Spec Sorting window appears and allows you to sort the specification sections in each category.Manage Spec Sorting window appears and allows you to sort the specification sections in each category.Manage Spec Sorting window appears and allows you to sort the specification sections in each category.Manage Spec Sorting window appears and allows you to sort the specification sections in each category.Manage Spec Sorting window appears and allows you to sort the specification sections in each category.Manage Spec Sorting window appears and allows you to sort the specification sections in each category.Manage Spec Sorting window appears and allows you to sort the specification sections in each category.Manage Spec Sorting window appears and allows you to sort the specification sections in each category.Manage Spec Sorting window appears and allows you to sort the specification sections in each category.Manage Spec Sorting window appears and allows you to sort the specification sections in each category.Manage Spec Sorting window appears and allows you to sort the specification sections in each category.Manage Spec Sorting window appears and allows you to sort the specification sections in each category.Manage Spec Sorting window appears and allows you to sort the specification sections in each category.Manage Spec Sorting window appears and allows you to sort the specification sections in each category.Manage Spec Sorting window appears and allows you to sort the specification sections in each category.Manage Spec Sorting window appears and allows you to sort the specification sections in each category.Manage Spec Sorting window appears and allows you to sort the specification sections in each category.Manage Spec Sorting window appears and allows you to sort the specification sections in each category.Manage Spec Sorting window appears and allows you to sort the specification sections in each category.Manage Spec Sorting window appears and allows you to sort the specification sections in each category.Manage Spec Sorting window appears and allows you to sort the specification sections in each category.Manage Spec Sorting window appears and allows you to sort the specification sections in each category.Manage Spec Sorting window appears and allows you to sort the specification sections in each category.Manage Spec Sorting window appears and allows you to sort the specification sections in each category.Manage Spec Sorting window appears and allows you to sort the specification sections in each category.Manage Spec Sorting window appears and allows you to sort the specification sections in each category.Manage Spec Sorting window appears and allows you to sort the specification sections in each category.Manage Spec Sorting window appears and allows you to sort the specification sections in each category.Manage Spec Sorting window appears and allows you to sort the specification sections in each category.Manage Spec Sorting window appears and allows you to sort the specification sections in each category.Manage Spec Sorting window appears and allows you to sort the specification sections in each category.Manage Spec Sorting window appears and allows you to sort the specification sections in each category.Manage Spec Sorting window appears and allows you to sort the specification sections in each category.Manage Spec Sorting window appears and allows you to sort the specification sections in each category.Manage Spec Sorting window appears and allows you to sort the specification sections in each category.Manage Spec Sorting window appears and allows you to sort the specification sections in each category.Manage Spec Sorting window appears and allows you to sort the specification sections in each category.Manage Spec Sorting window appears and allows you to sort the specification sections in each category.Manage Spec Sorting window appears and allows you to sort the specification sections in each category.Manage Spec Sorting window appears and allows you to sort the specification sections in each category.Manage Spec Sorting window appears and allows you to sort the specification sections in each category.Manage Spec Sorting window appears and allows you to sort the specification sections in each category.Manage Spec Sorting window appears and allows you to sort the specification sections in each category.Manage Spec Sorting window When the Edit Specification Print Sort Order link is clicked, from the Spec Management section of the Sales Admin tab, this window is displayed and allows you to sort the specification sections in each category. appears and allows you to sort the specification sections in each category. Manage Spec Sorting window appears and allows you to sort the specification sections in each category. Manage Spec Sorting window appears and allows you to sort the specification sections in each category. Spec Sorting window appears and allows you to sort the specification sections in each category.., click the Edit Specification Print Sort Order link to sort the specification sections in each category. The Manage Spec Sorting window When the Edit Specification Print Sort Order link is clicked, from the Spec Management section of the Sales Admin tab, this window is displayed and allows you to sort the specification sections in each category. appears.
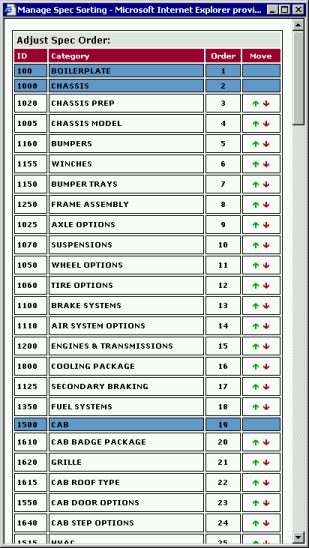
To sort the items in each category, click the green up arrow to move the item up and click the red down arrow to move the item down. The changes are automatically saved, apply to all users in your dealership, and are reflected on the reports generated in the E-ONE Report Viewer. Note: You cannot move a category item outside of its category. Click the 'X' in the upper right corner to close the Manage Spec Sorting window.
Under the Template Management section, click the Manage Dealership Templates link to access the templates. This allows the Sales Admin to access stored quotes which are standard configurations for a truck. The Quote Retrieval window appears with Work With Templates page.

Click the Template # link and the Quote window appears. This is the template also known as a stored configuration within a saved quote.
Under the Pricebook Report section, click the View / Print / Export EzONE Pricebook by model link. The Model Price Book Report window appears.
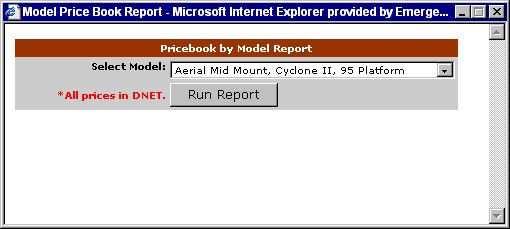
Select the Model from the following:
Aerial Mid Mount, Cyclone II, 95 Platform
Aerial Rear Mount, Cyclone II, HP75 Ladder
Aerial Rear Mount, Cyclone II, 92 Platform
Aerial Rear Mount, Cyclone II, 100 Foot Ladder
Aerial Rear Mount, Cyclone II, Bronto Platform
Aerial Rear Mount, Typhoon, HP 75 Ladder
Aerial Tiller, Cyclone II, 100 Foot Ladder
ARFF, 4x4 Independent Axle
ARFF, 6x6 Independent Axle
ARFF, 8x8 Independent Axle
ARFF, 8x8 Independent Axle, 50 Foot Boom
ARFF, 4x4 Independent Axle, 50 Foot Boom
Pumper, Commercial Chassis
Pumper, Cyclone II
Pumper, Typhoon
Legacy Tradition Aerial, Typhoon, HP75 Ladder
Tradition Pumper, Commercial Chassis
Tradition Pumper, Typhoon Chassis
Aerial Mid Mount, Quest, 95 Platform
Aerial Rear Mount, Quest, HP75 Ladder
Aerial Rear Mount, Quest, 100 Foot Ladder
Aerial Rear Mount, Quest, Bronto Platform
Aerial Tiller, Quest, 100 Foot Ladder
ARFF, 6x6 Independable Axle with monitor platform
Aerial Rear Mount, Quest 100 Foot Platform
4x4 P701
6x6 P711 Titan Force
Aerial Rear Mount, Quest, Cyclone II, 100 Foot Platform
Aerial Rear Mount, Quest, 92 Platform
American Eagle Pumper, Commercial Chassis
American Eagle Pumper, Cyclone II
American Eagle Pumper, Typhoon
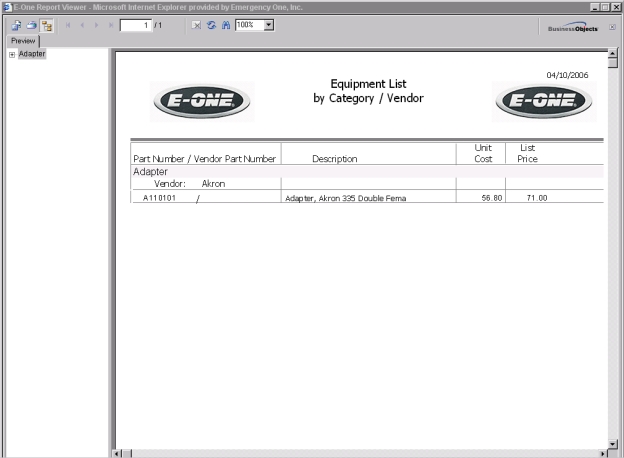
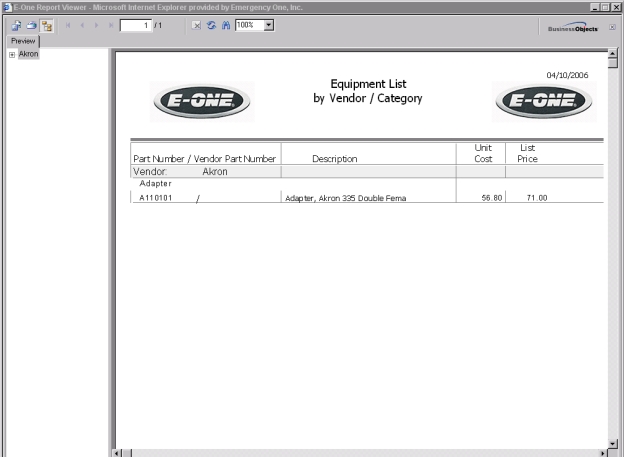
Click the Run Report button to generate the report in the E-ONE Report Viewer.
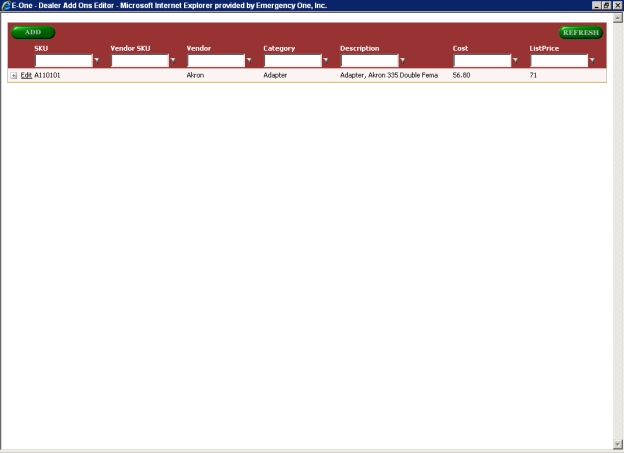
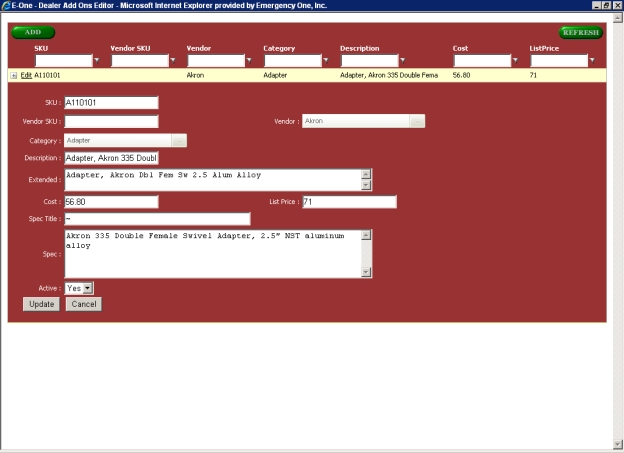
The Maintain (Add and Edit) your dealer addon database link allows you to edit the dealer add-ons for your dealership. The Dealer Add Ons Editor window consists of seven fields, a + icon to expand and collapse a summary, an Edit link and two buttons, add and refresh. The Add Ons Editor is for creating a dealer options database and reports about your dealership bids and quotes. The database can be updated if descriptions, specs and prices change in the future.
Add a new record
Click on the Add button on the top left corner.
A collection of empty fields with an Insert and Cancel button should appear.
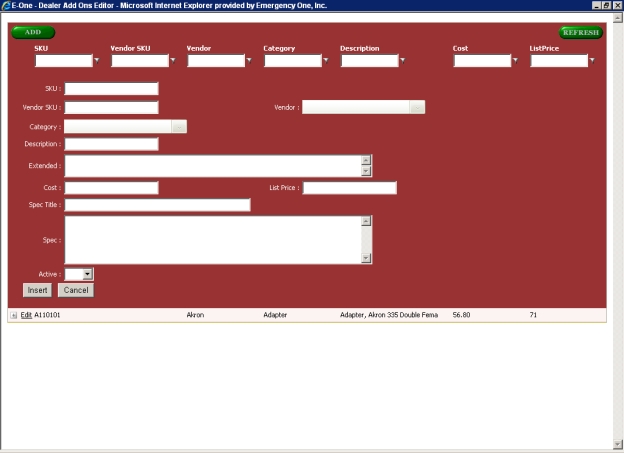
SKU Button is a required field.
Vendor SKU: field: Enter the vendor SKU number.
Vendor: field: Enter the name of the vendor.
Category: field: Enter the category of the item in this field.
Description: field: Enter a description of the item.
Extended: field: Enter an extended description of the item.
Cost field: Enter the cost of the item.
List Price: Enter the list price.
Spec Title field: Enter the title of the specification.
Spec field: Enter the specification of the Dealer Add-on.
Active drop down list: Select Yes or No to make the Dealer Add-on active or not.
Category and Vendor fields will automatically search for any matching values as you type them in. This functionality is case sensitive.
Click the Insert button to insert a new record.
Click the Cancel button to cancel the insert.
Edit an existing record
Click the Edit link on the left hand side of the record to be edited.
A collection of fields with an Update and Cancel button should appear.
Make your changes; keep in mind that the SKU field is a required field.
Category and Vendor fields will automatically search for any matching values as you type them in. This functionality is case sensitive.
Click on the Update button to commit your updates.
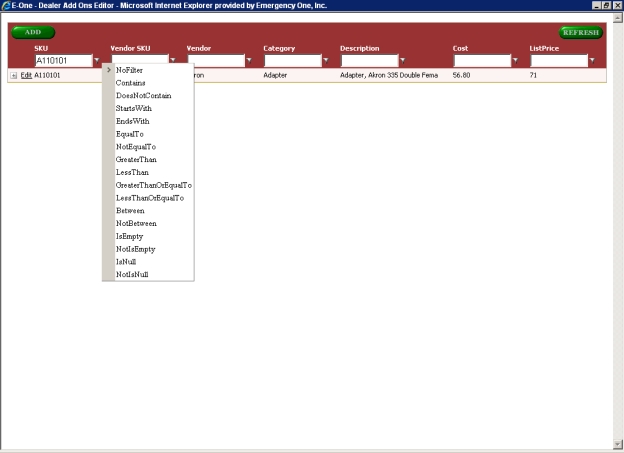
How to filter
Each field has an input box at the bottom of each field header.
Enter text or an amount into the input box of the corresponding field in which you want to filter.
Click on the icon to the right of the input box to select the type of filter you would like to apply. Once selected the filter will be applied to the data being viewed.
It is possible to apply multiple filters by following the instructions on step 34 for any other fields in which you would like to apply a filter.
To remove a filter click on the icon to the right of the input box being used as a filter and select No Filter.
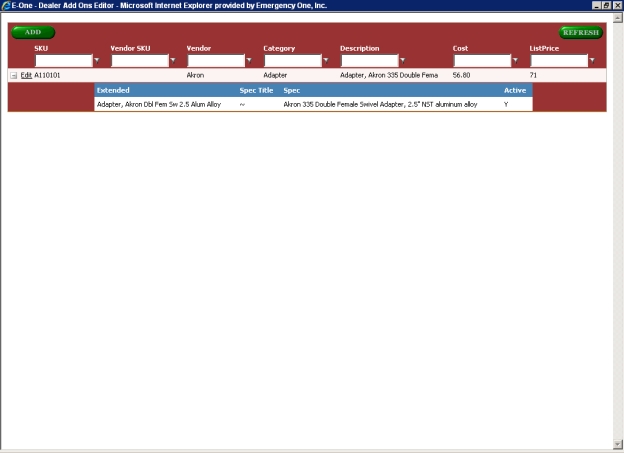
View a detailed record
To view more information on a particular record select the + icon to the left of the Edit link on the left hand side of the record being viewed.
This should expand and list a second row of fields.
To collapse the current view click on the - icon to the left of the Edit link.
When a dealer add on SKU number is changed from the Dealer Add on Editor database while it's on a quote the changed dealer add on item will stay on the quote. The description of the item will be "DELETED".
EzWRITER leads without Quotes created
Location Master Listing
Unacknowledged EZWRITER leads
The E-ONE Report Viewer window appears with the generated report. Select your username from the left column.
Click the Print Report icon and from the Print dialog box click Print to send the hard copy to the printer. Click the 'X' in the upper right corner to close the window.

The E-ONE Report Viewer window appears with the generated report.
Click the Print Report icon and from the Print dialog box click Print to send the hard copy to the printer. Click the 'X' in the upper right corner to close the window.
The E-ONE Report Viewer window appears with the generated report.
Click the Print Report icon and from the Print dialog box click Print to send the hard copy to the printer. Click the 'X' in the upper right corner to close the window.
The E-ONE Report Viewer window appears with the generated labels. First, insert the labels similar to Avery 5162 into the printer. Next, click the Print Report icon and from the Print dialog box click Print to send the hard copy to the printer. Click the 'X' in the upper right corner to close the window.

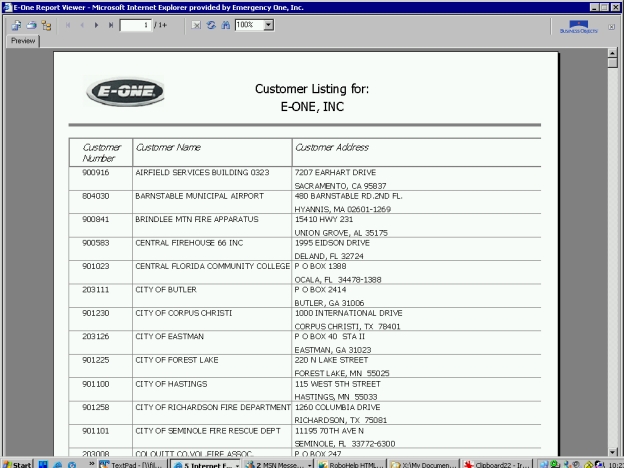
The E-ONE Report Viewer window appears with the customer listing and includes all customers who have bought recently. These customers are also in our BaaN system. Click the Print Report icon and from the Print dialog box click Print to send the hard copy to the printer. Click the 'X' in the upper right corner to close the window.
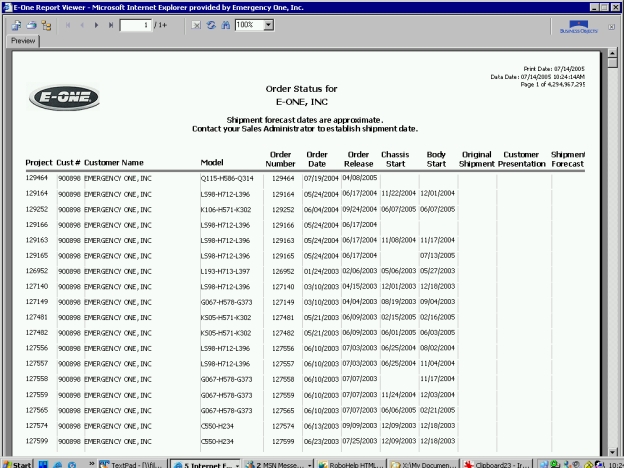
The E-ONE Report Viewer window appears with the dealer truck order status. Click the Print Report icon and from the Print dialog box click Print to send the hard copy to the printer. Click the 'X' in the upper right corner to close the window.
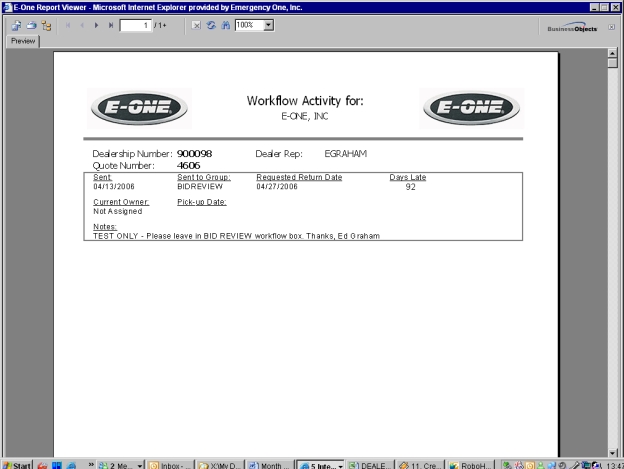
Click the Workflow Activity by Dealership link. This report will provide the dealer with bid review and order entry The final step in the Workflow process.Workflow Workflow is the electronic method used to send a quote for a bid bond request, concession request and/or as an order to the appropriate group. This will speed up the turnaround time for requests on quotes. process.Workflow process.Workflow process.Workflow process.Workflow process.Workflow process.Workflow process.Workflow process.Workflow process.Workflow process.Workflow process.Workflow process.Workflow process.Workflow process.Workflow process.Workflow process.Workflow process.Workflow process.Workflow process.Workflow process.Workflow process.Workflow process.Workflow process.Workflow process.Workflow process.Workflow process.Workflow process.Workflow process.Workflow process.Workflow process.Workflow process.Workflow process.Workflow process.Workflow process.Workflow process.Workflow process.Workflow process.Workflow process.Workflow process.Workflow process.Workflow process.Workflow process.Workflow process. information on the quotes that they have submitted.
The E-ONE Report Viewer window appears with the dealer truck order status. Click the Print Report icon and from the Print dialog box click Print to send the hard copy to the printer. Click the 'X' in the upper right corner to close the window.
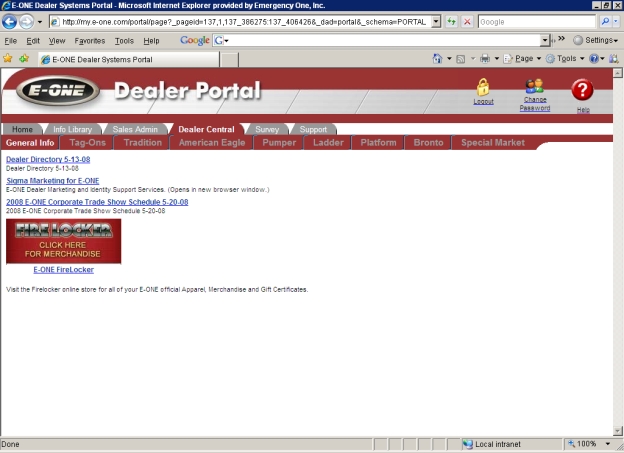
The Dealer Central tab is for the dealers to obtain information. The Sigma Marketing for E-ONE and the E-ONE Fire Locker can be viewed here from the General Info tab.
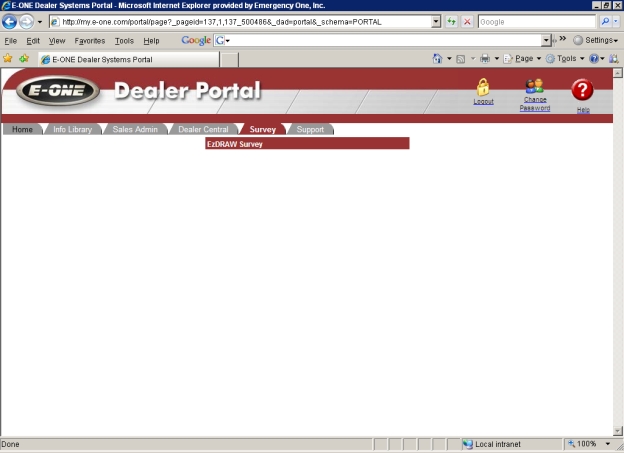
The Survey tab This tab has Rescue Product survey. has an EzDraw survey.
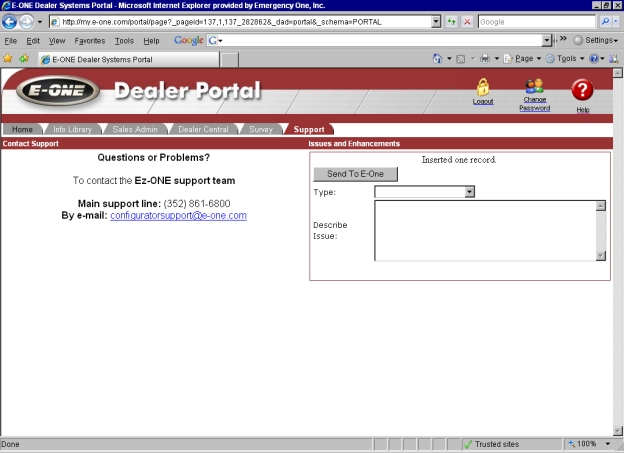
The Support tab Displays the Support page and the Issues and Enhancements section. Feel free to e-mail or call us if you have problems and/or questions with the Dealer Portal. E-mail: configuratorsupport@e-one.com. Phone: 352-861-6800Dealer A Web based server application that runs in Microsoft® Internet Explorer® utilizing Web services on the Internet. This application improves and simplifies your sales process.Portal. Dealer Portal .Dealer Portal .e-mail or call us if you have problems and/or questions with the Dealer A Web based server application that runs in Microsoft® Internet Explorer® utilizing Web services on the Internet. This application improves and simplifies your sales process.Portal. Dealer Portal .Dealer Portal .Dealer Portal .Dealer Portal .Dealer Portal .Dealer Portal .Dealer Portal .Dealer Portal .Dealer Portal .Dealer Portal . Dealer Portal . Dealer Portal . Dealer Portal . Dealer Portal . displays the Support page along with the Contact Support and Issues and Enhancements sections. Feel free to e-mail or call us if you have problems and/or questions with the Dealer Portal.
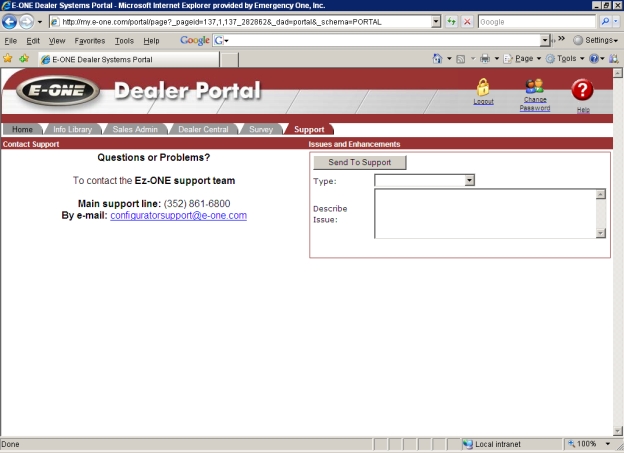
The Issues and Enhancements section allows user to submit feedback based on your Dealer Portal experience. Questions or issues submitted through the feedback from are stored in a database monitored by Dealer Systems Support Group and are addressed in a timely fashion. This section contains a Type: drop down list, a Describe Issue: field, and the Send To E-One button Anything you enter in the Describe Issue will be saved as a record in E-ONE's database. An e-mail will be sent to the Dealer Portal Support Group..
Type: drop down list: Select one from the following:
Enhancement Request
Bug Report
Spec Problem
Configurator Creates a new configuration from a new quote. Creates a new configuration from a new quote. Issue
Security Issue
General Comment
Beta Testing Feedback (Beta testers only)
Ez-Draw Ez-Draw is an online drawing generator that can be used to produce conceptual bid drawings based on your Ez-ONE quotations. Feedback
Enter the issue you want to submit in the Describe Issue: field.
Select a Type: from the drop down list.
Click the Send To E-One button. The issue will be saved as a record in E-ONE's database, displayed to the Dealer Systems Support Group as an open item and an e-mail is sent to Dealer Portal Support.
Related topics:
Contact E-ONE Dealer Systems Support Group